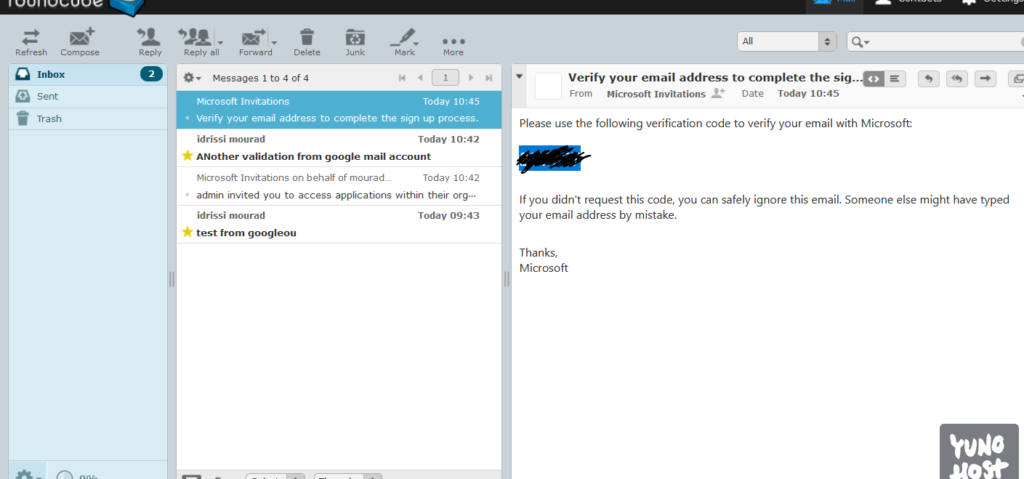
Before creating your client, you need to create a PAT ( Personal access Token), so that your application can call azure devops and interact with it in a REST manner.
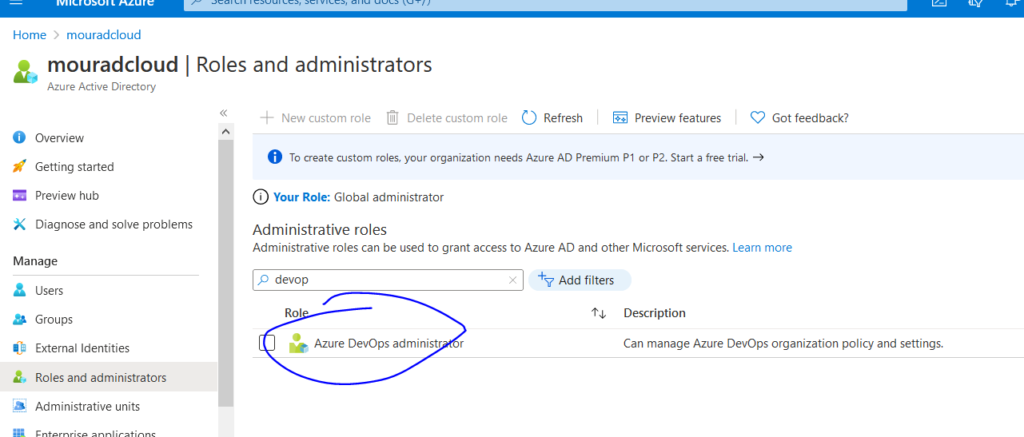
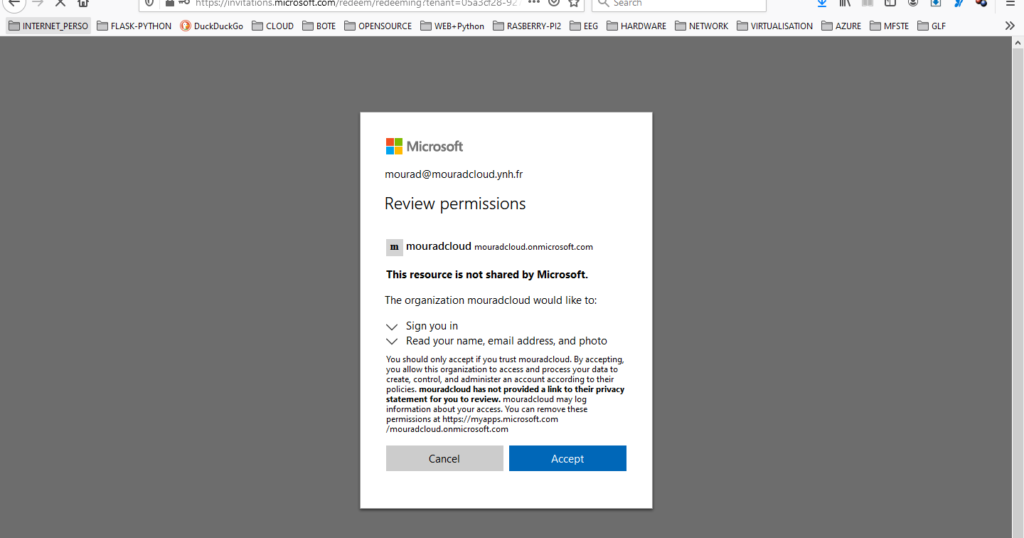
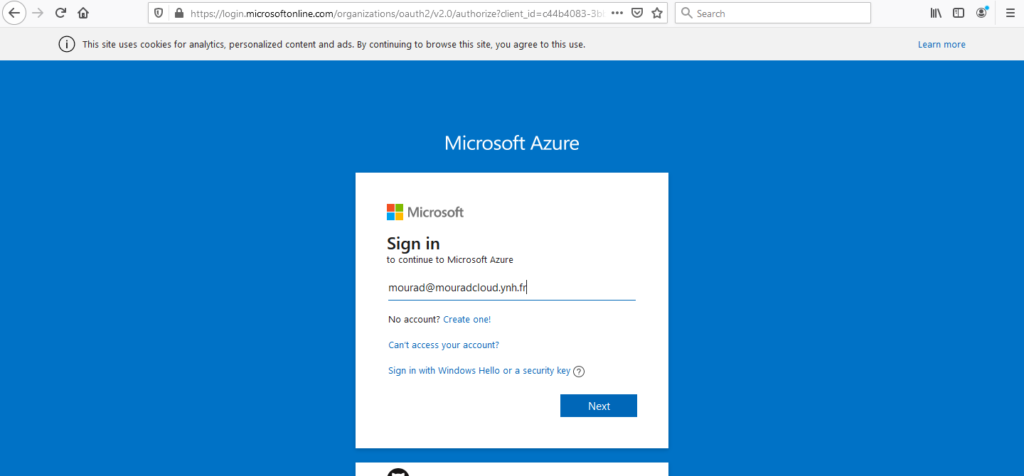
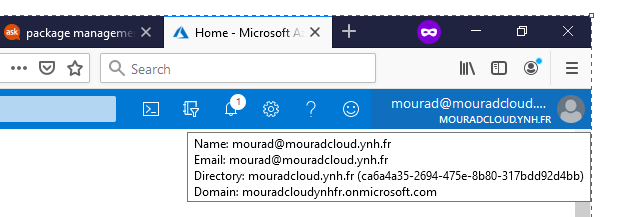
But before going further, a good practice is to use a service account created in Azure Active Directory with the role DevOps Administrator :
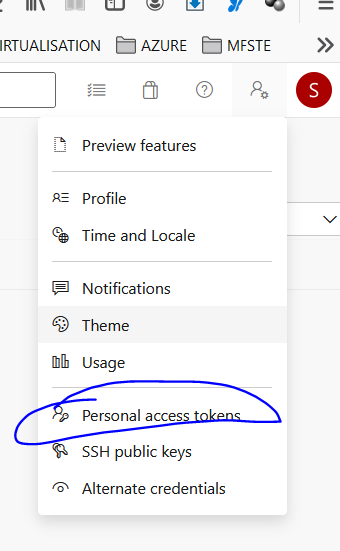
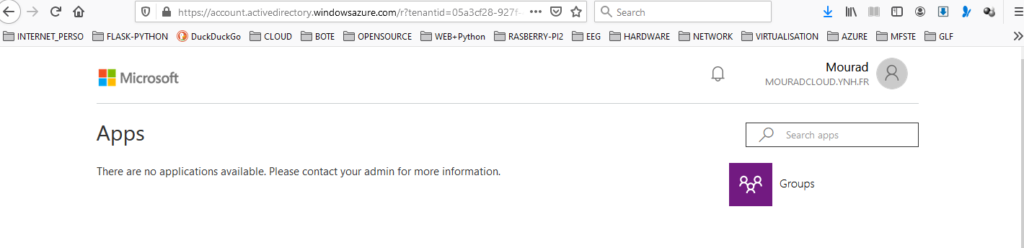
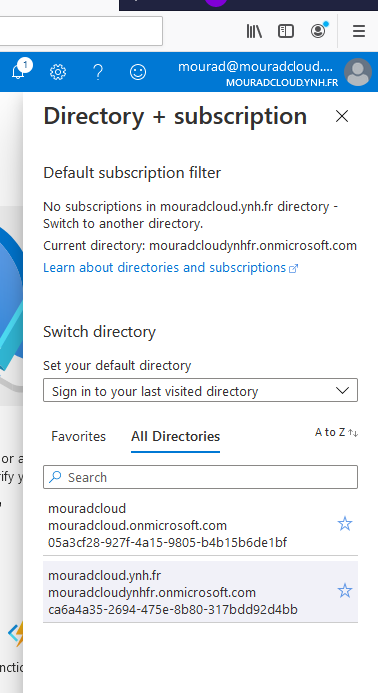
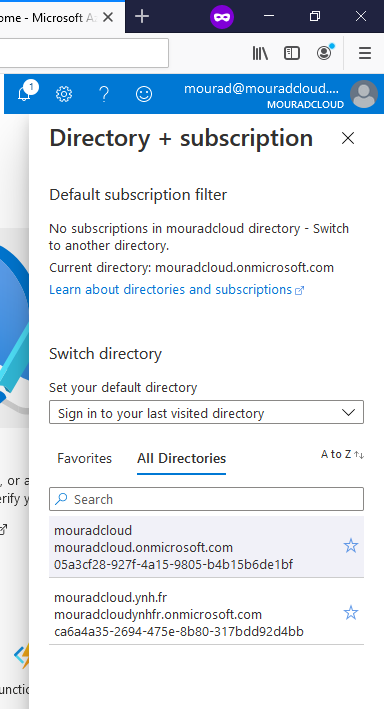
Now that you have the role and logged with it, you can go straight to Azure DevOps.. :
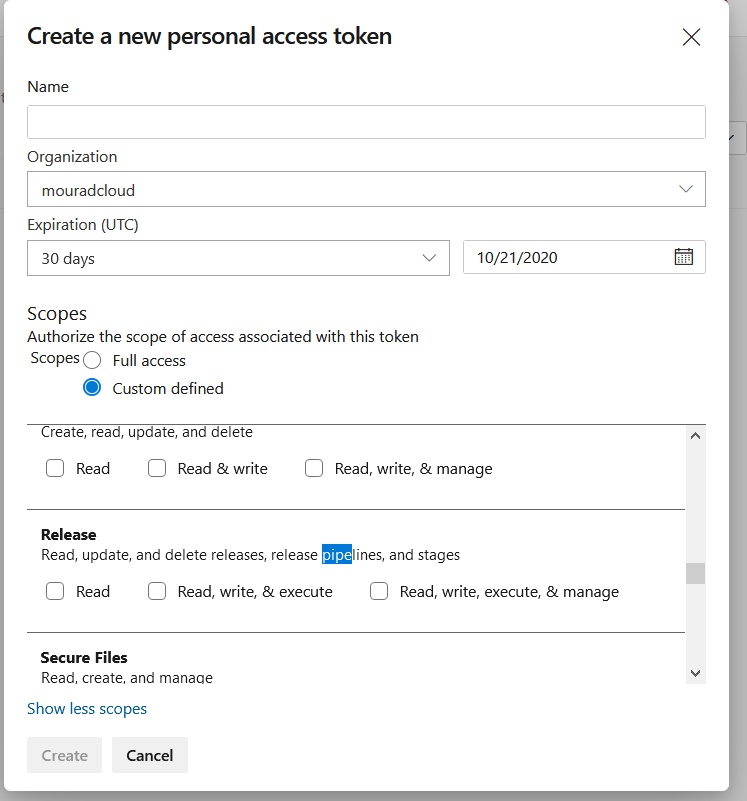
Give it a name and allow some right to it. In my case, I want to start some release pipeline when I am going to trigger calls..
Make sure you save the token…
Let’s code now. Create the client using your favorite language ( python SDK source here ) . first you install the library :
pip install azure-devops
Then code client will be :
from azure.devops.connection import Connection from msrest.authentication import BasicAuthentication import pprint
# Fill in with your personal access token and org URL
# Get a client (the "core" client provides access to projects, teams, etc)
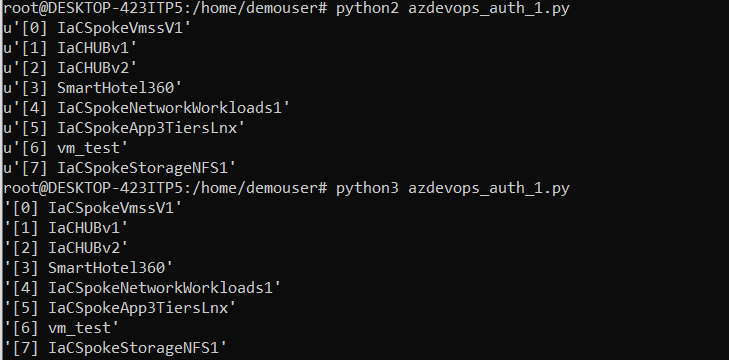
core_client = connection.clients.get_core_client() # Get the first page of projects get_projects_response = core_client.get_projects() index = 0 while get_projects_response is not None: for project in get_projects_response.value: pprint.pprint("[" + str(index) + "] " + project.name) index += 1 if get_projects_response.continuation_token is not None and get_projects_response.continuation_token != "":
# Get the next page of projects
get_projects_response = core_client.get_projects(continuation_token=get_projects_response.continuation_token) else: # All projects have been retrieved get_projects_response = None
And… voila :
Now the fun part, let’s trigger a pipeline !
Here is the synthax to run a pipeline :
from azure.devops.connection import Connection from msrest.authentication import BasicAuthentication import pprint
# Fill in with your personal access token and org URL personal_access_token = 'XXXXXXXXXXXXXXXXXXXXXXXXXXXX' organization_url = 'https://dev.azure.com/mouradcloud' project_name = "IaCSpokeStorageNFS1" pipelines_name ='IaCSpokeStorageNFS1-CI-preprod' pipelines_id =13
# Create a connection to the org credentials = BasicAuthentication('', personal_access_token) connection = Connection(base_url=organization_url, creds=credentials)
# create a Get a pipeline client def create_pipeline_client(): # Get connection from devOps & create pipeline client pipeline_client = connection.clients_v5_1.get_pipelines_client() return pipeline_client
# Get the first page of pipeline pipeline_client = create_pipeline_client() pipeline_list_response = pipeline_client.list_pipelines(project_name)
In this post we are going to discuss on how we could leverage azure devops to do IaC as code. there is plenty ways to address the use case, but I will do easiest way here. first step will be to use it for CI. For CD, Ansible will be used along with Azure devops.
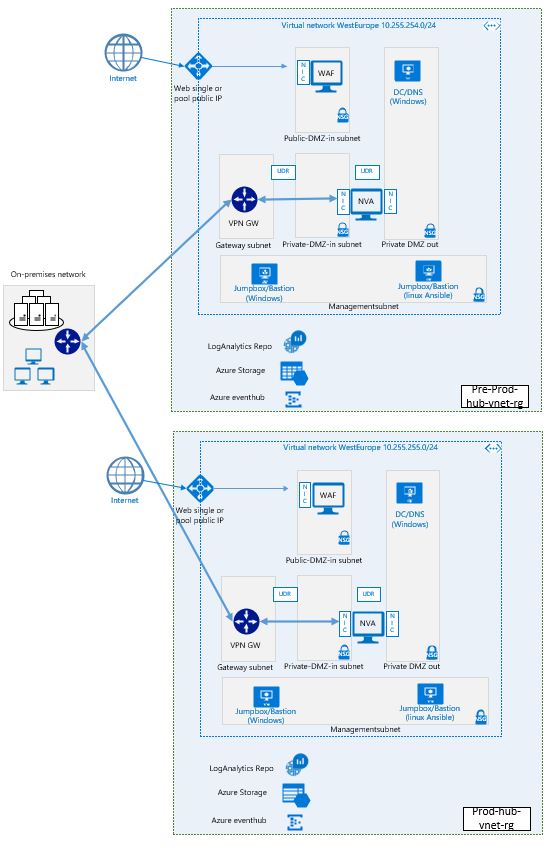
End target is to create and operates HUBs ( prod and pre-prod in a CI-CD fashion )
In this post we are going to discuss on how we could leverage azure devops to do IaC as code. there is plenty ways to address the use case, but I will do easiest way here. first step will be to use it for CI. For CD, Ansible will be used along with Azure devops.
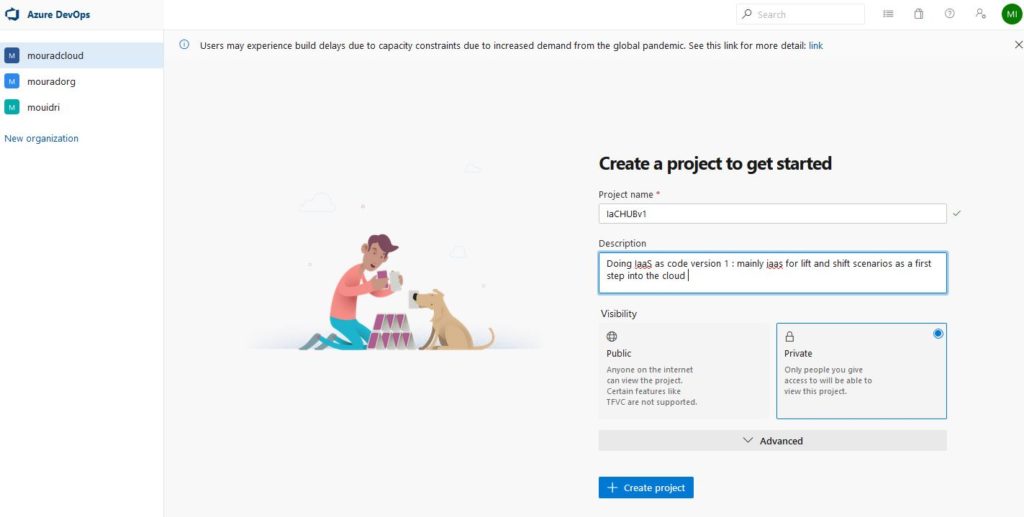
Start creating an Azure Devops projects. Since we are going to simulate production and pre-production environment for IaC, we are going do some segregation for compliance and governance concerns.
Assuming you have created an organization already, I created the project IaCHUBv1 :
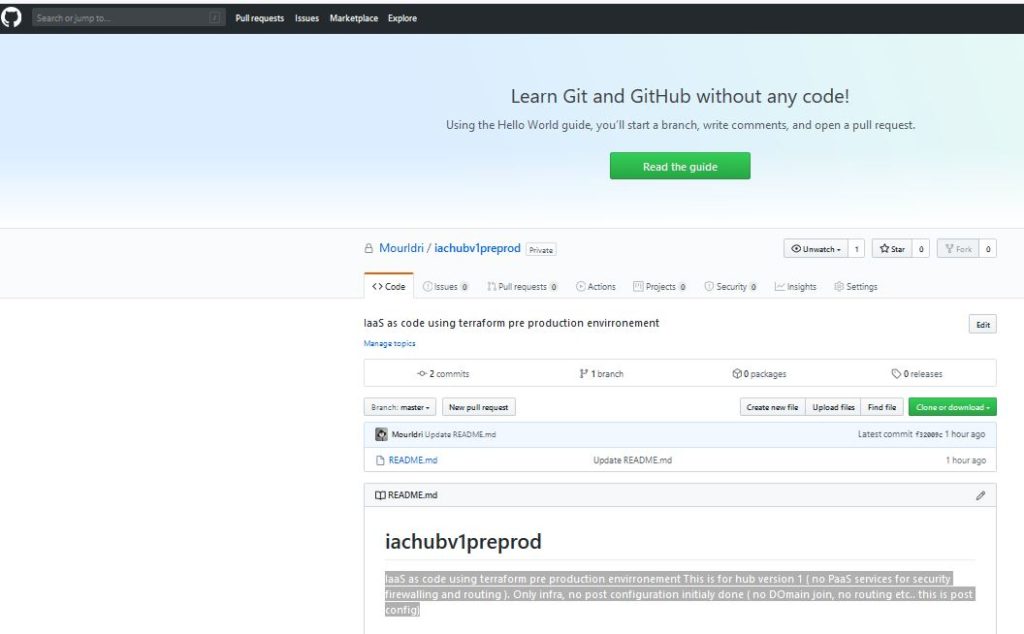
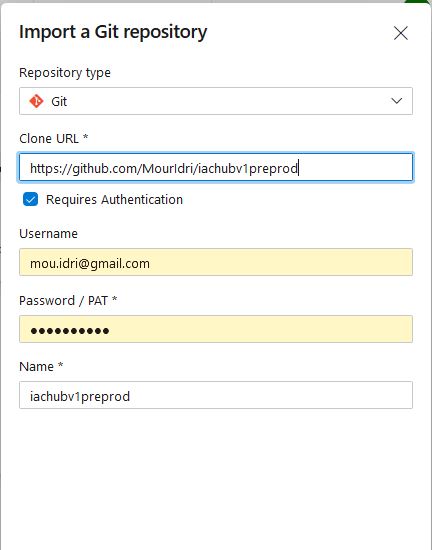
I went on github and created 2 private repos (empty for the moment ) , one for production and second for pre-production, As I want to have the possibility to manipulate each one at will.
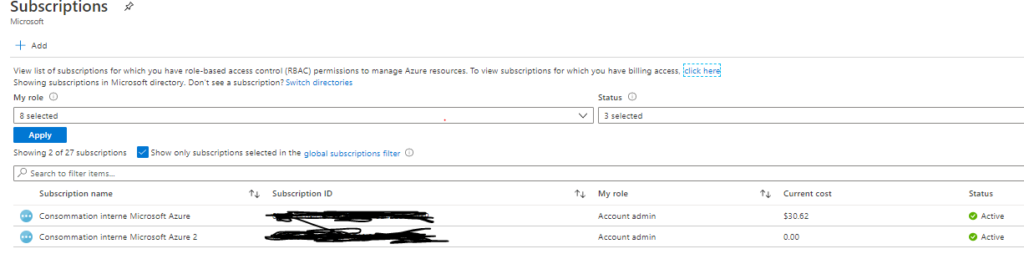
No I go to Azure and I am going to use 2 subscriptions, one for production and other one for pre-production environment
On those 2 subscriptions, I am going to create 2 services principals that are going to be the identity that will do deployment. You can use this command line to check :
az account list --output table
This will give something like this :
I am going to select to first and third with this ( you will need to repeat the to command below 2 times, one for each subscriptions ) :
az account set --subscription <Azure-SubscriptionId>
az ad sp create-for-rbac --role="Contributor" --scopes="/subscriptions/SUBSCRIPTION_ID"
This will give you the service principals ( example for the first one ) :
These values will be mapped to the Terraform variables this way, note those value in a safe place for the moment ( you will not be able to get them back ) :
appId (Azure) → client_id (Terraform).
password (Azure) → client_secret (Terraform).
tenant (Azure) → tenant_id (Terraform).
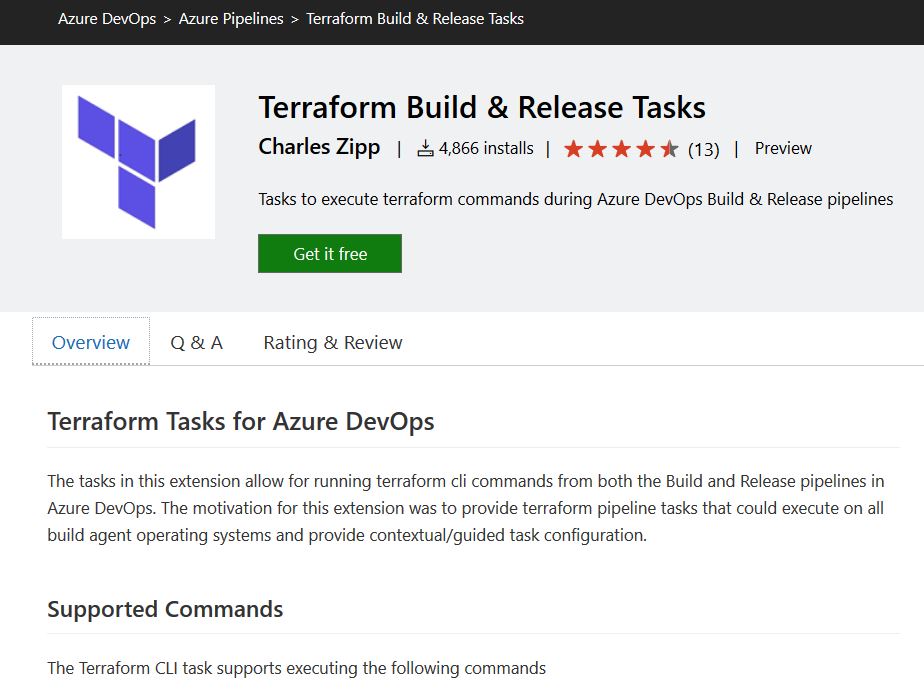
Now go to the terraform plugin for azuredevops and just install it to you organisation
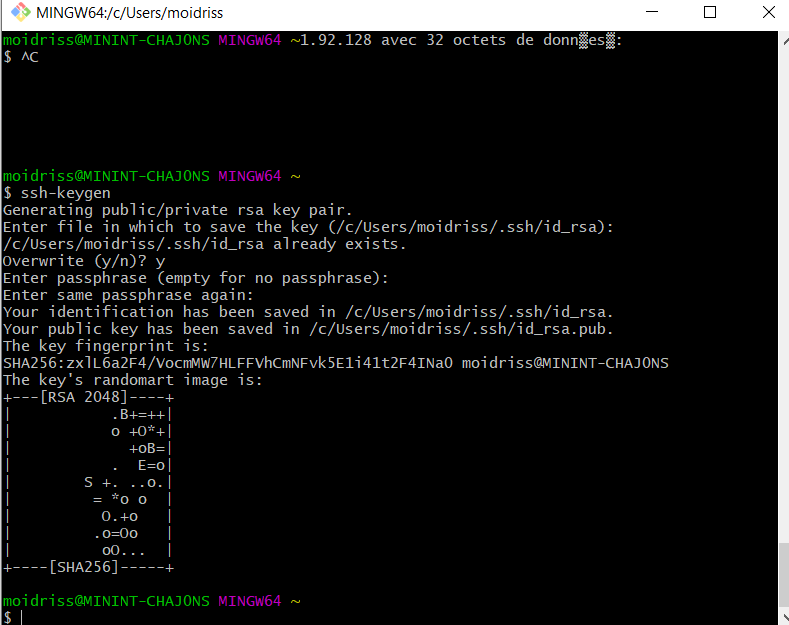
We need to authenticate to Azure DevOps using SSH keys. If we have SSH keys, we can skip this step, and jump to the next one.
ssh-keygen -C "email@domain.com"
The process will generate two files id_rsa and id_rsa.pub files. The first one is the private key (don’t share it) and the second one is the public key.
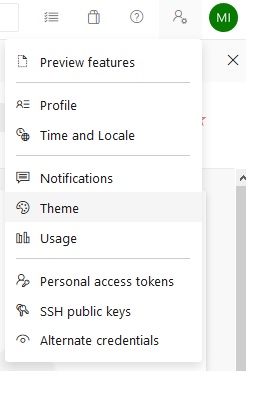
After we generated the SSH keys, it is time to upload them to Azure DevOps. We open the Azure DevOps website, click on our profile picture, then click on 3 dots and finally click on user settings option.
On the menu, we click on the SSH public keys option:
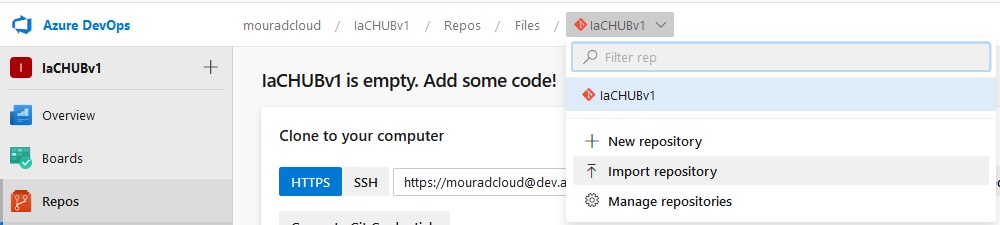
Now we add the empty repos previously created :
Repeat the operation for every repo you want to add
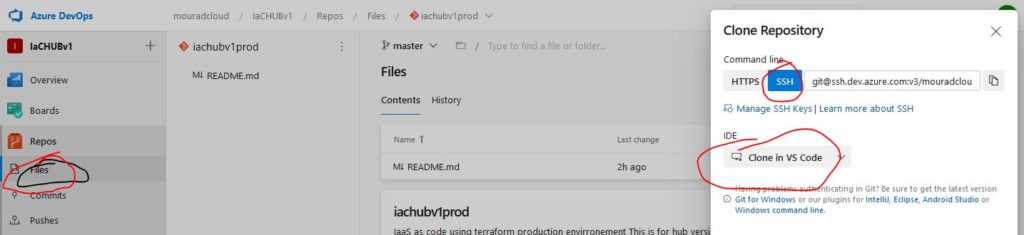
Thenk go on the files section to get url of files :
No I go to my laptop were my code is sitting and I will git init the location
I will type those from the location I selected
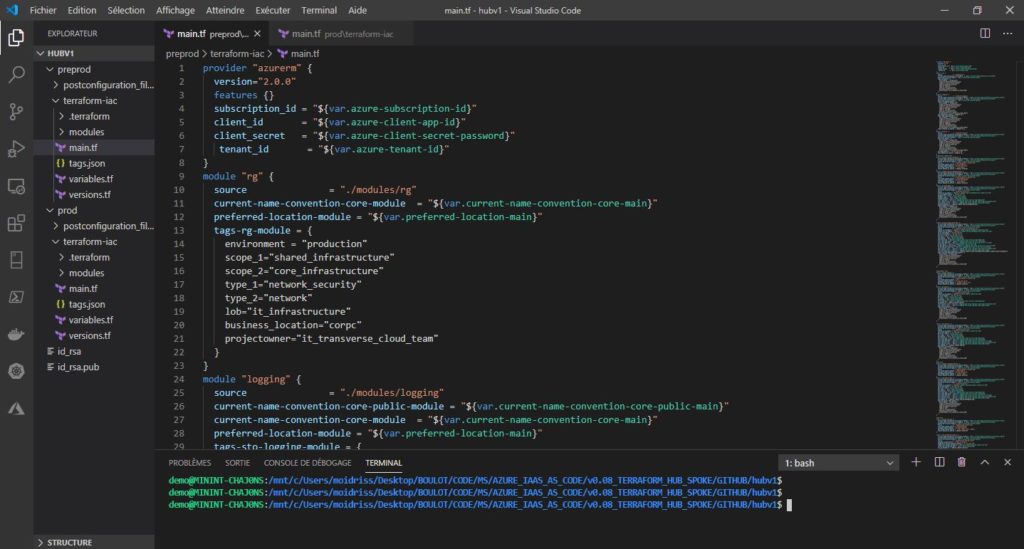
git init
git remote add origin git@ssh.dev.azure.com:v3/mouradcloud/IaCHUBv1/iachubv1preprod
git add .
git commit -m "commit with terraform files upload initial"
#there is a readme file in the repo, you first need to pull before pushing :
git pull git@ssh.dev.azure.com:v3/mouradcloud/IaCHUBv1/iachubv1preprod
#then push
git push --set-upstream origin master
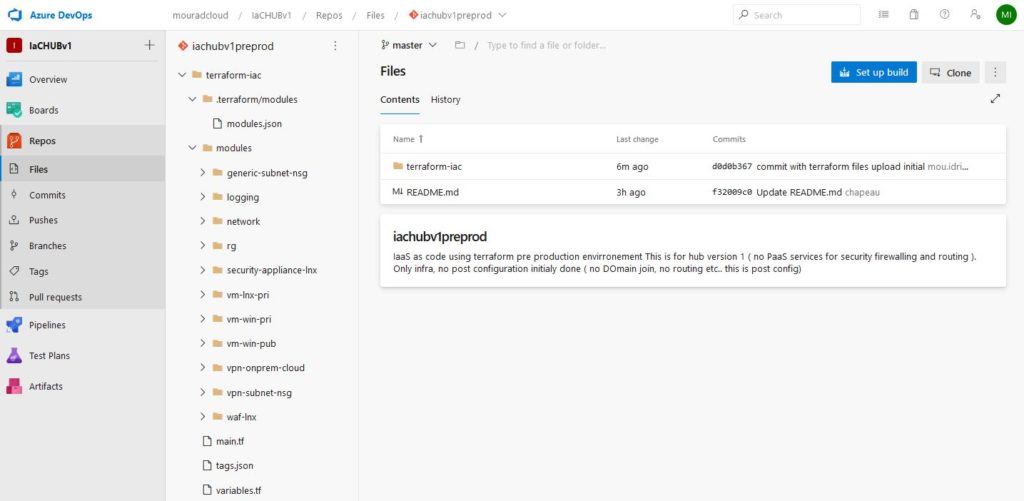
You will be able to see uploaded files :
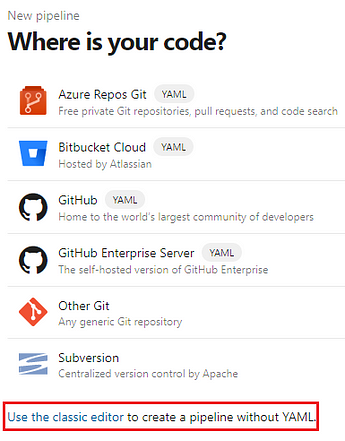
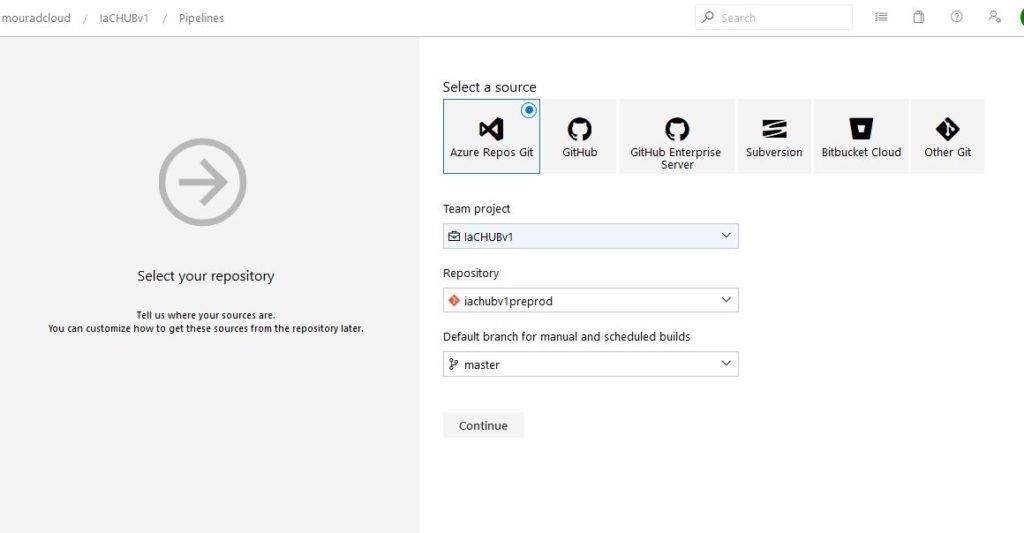
Creating now the Azure pipeline to deploy our IaC
Then select source :
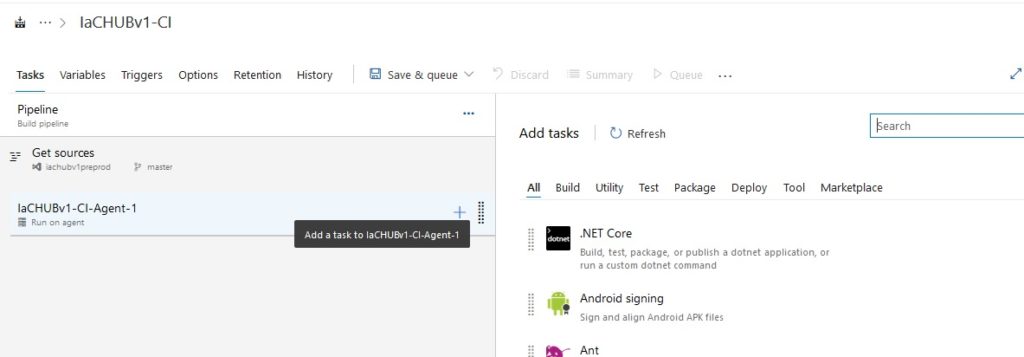
then empty jobs :
We will change the name of the Agent. As for now, we will be using Azure devops free build agent. We will be able to add agent pool later if more power is needed, but this is not free, you will need to declare VMs that are going to do it.
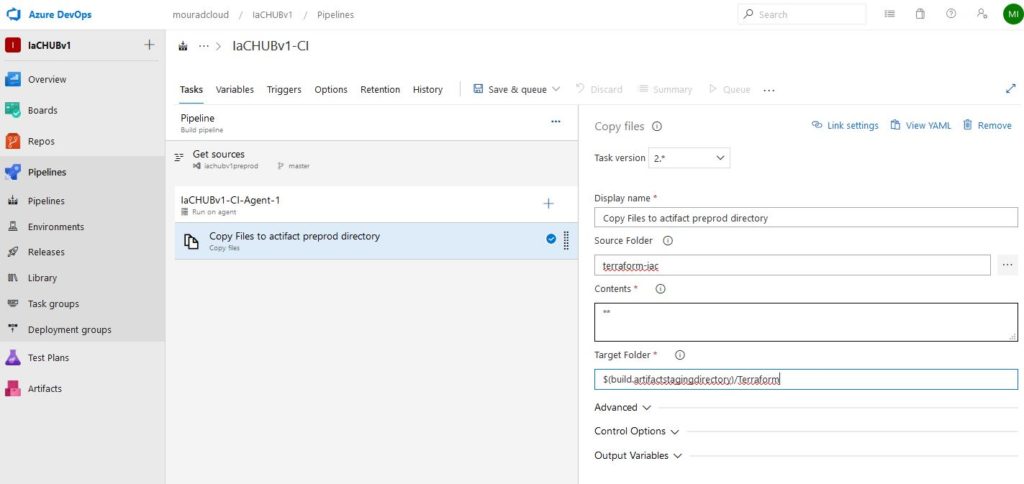
Then we will add a task to copy files :
We choose the Repos source folder, and select to copy all content. We will set the target folder as : $(build.artifactstagingdirectory)/Terraform
We click the plus sign (+) to add a new job. Type Publish Build Artifacts and leave it with default parameters:
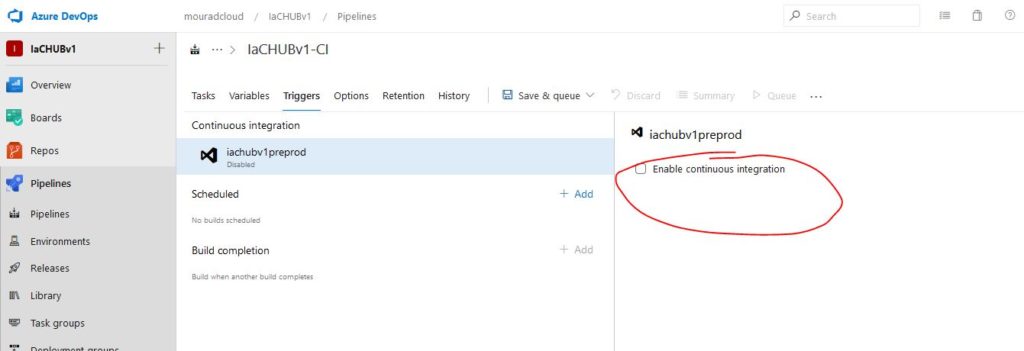
There is the possibility to use the following option that is going to trigger a CI when the source repo is modified and changes are committed ( we will not activate this for the HUB, there is no special interest since this is a near-static environment. However, we can Create new CIs using sub folder in the terraform modules if we want to add minor changes into the configuration.
we do not check the box !!
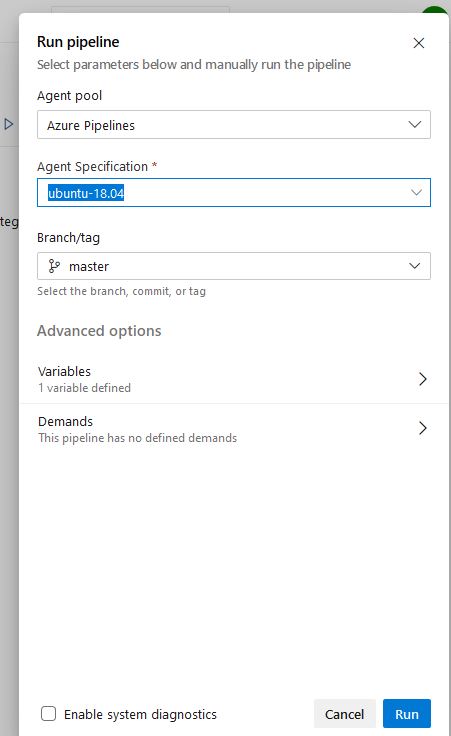
Then Queue it for the CI to be collected by an available agent than is going to be run
It is creating a build for you, which is basically, nothing more than copy files from the repo to the agent that will run later tasks.
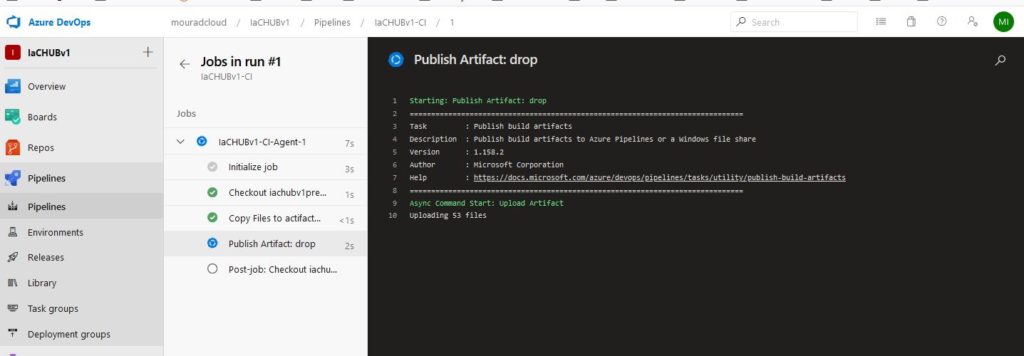
Now, while checking the logs :
You should receive an email telling you that your build is successful. If the status of the job is Sucess, we are ready for the next step, where we are going to create the Release Pipeline.
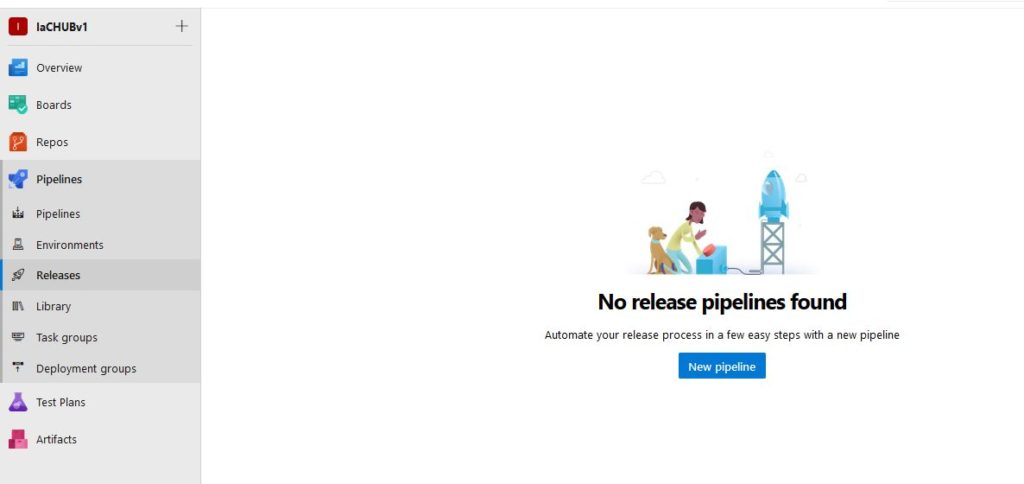
On this stage, we will use the artifact generate on the build pipeline and create a Stage task with these following tasks:
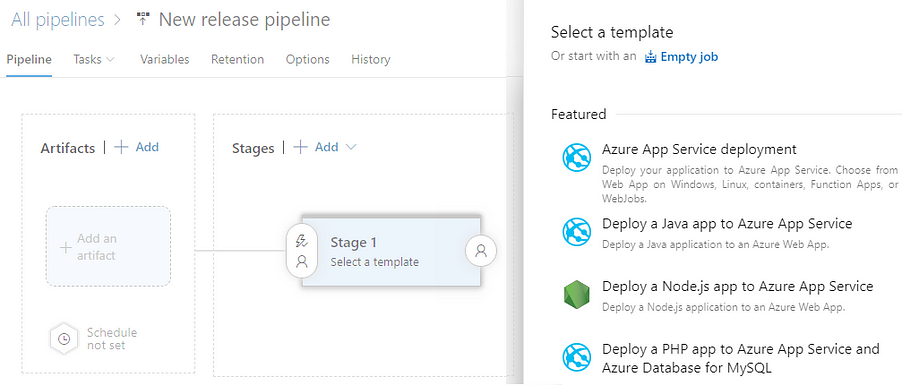
In the Select a template page, we choose an Empty job template:
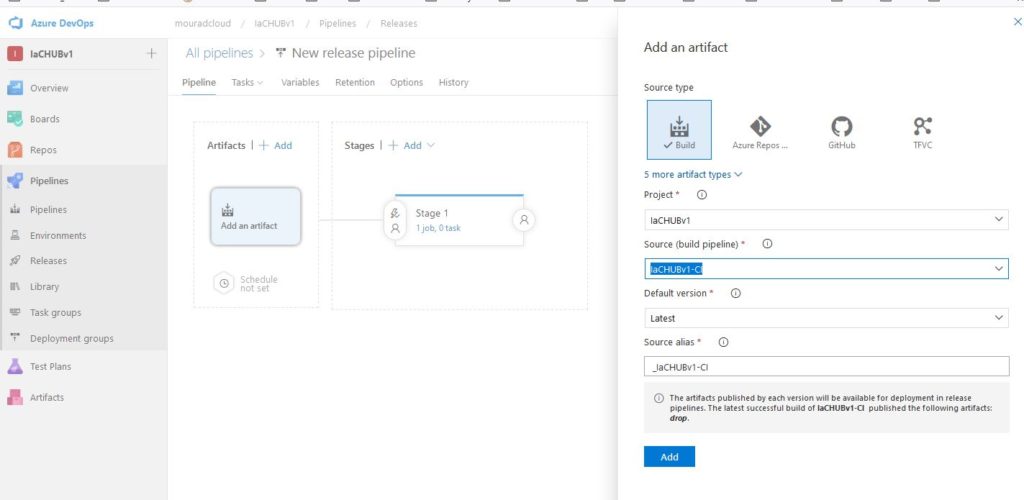
Then we click on the Add an artifact button.
In the Add an artifact page, we choose the Build button and configure the Source (build pipeline) to use the build pipeline created on the previous step.
We click the Add button, DO NOT (yet) click on the lightning icon and activate the CD (Continuous Deployment), we keep this of other use not for HUBs.
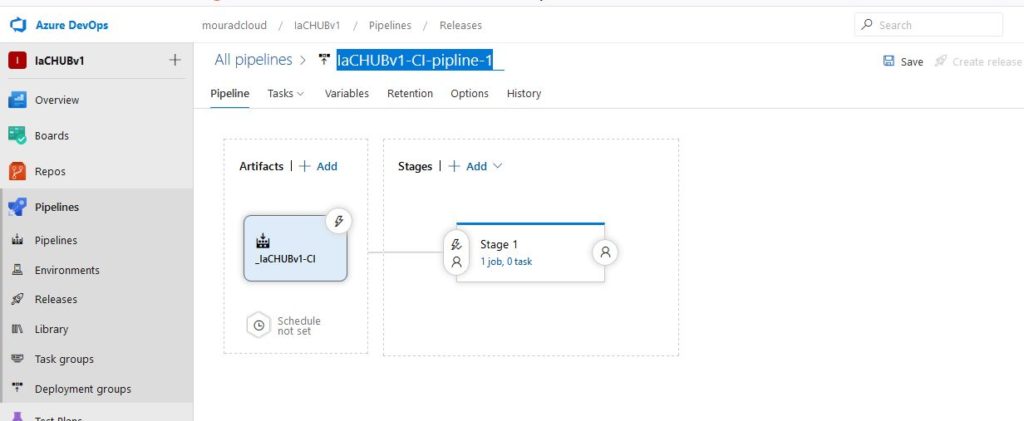
We close the Continuous deployment trigger page and rename the pipeline:
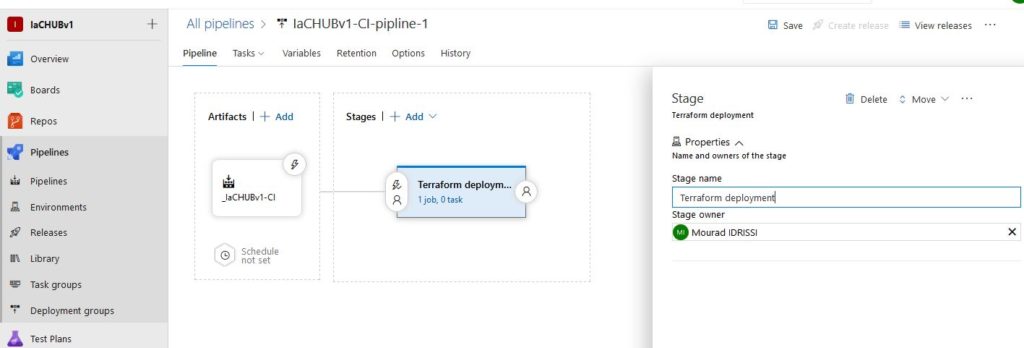
Now, we need to configure the Stages. Click on the Stage 1 button to rename the stage name.
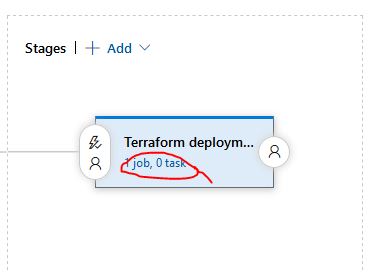
We close the Stage name page and then click on the 1 job, 0 task link on Terraform deployment button.
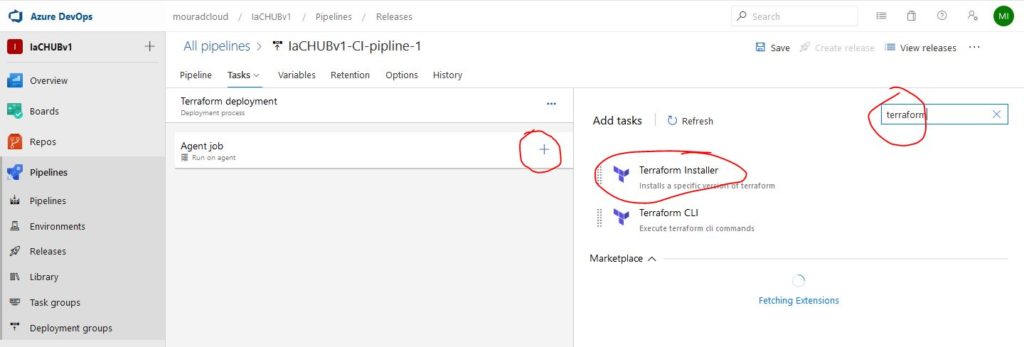
We click on the plus sign (+), next to the Agent job and search for terraform.
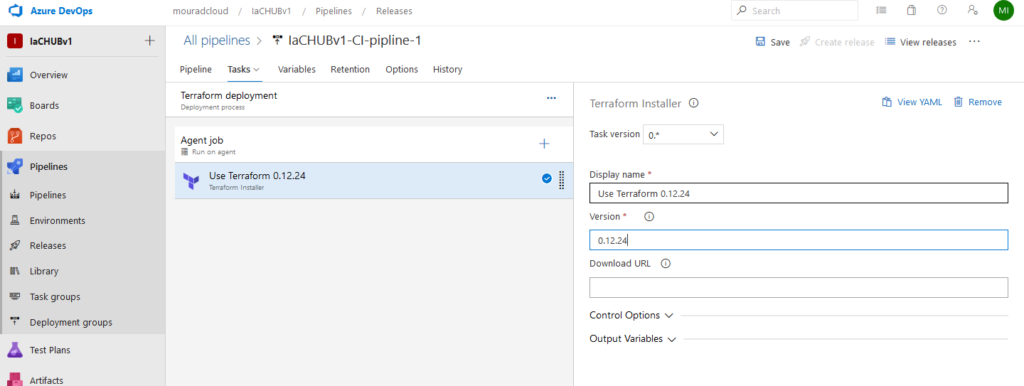
We select the Terraform Installer task and click on the Add button next to it.
The Terraform Installer task is added with the latest version of Terraform, but I am changing it to another :
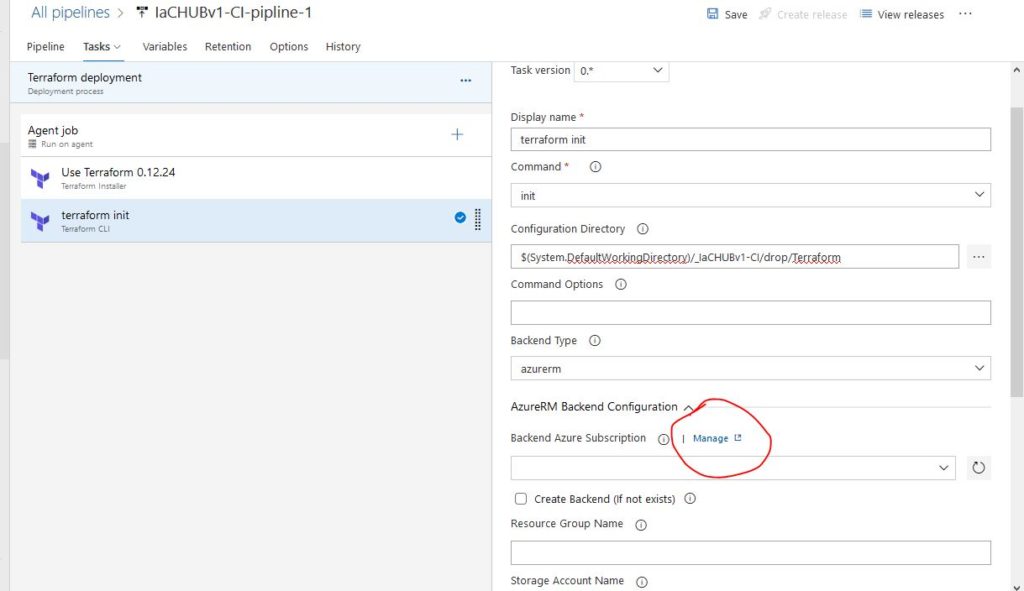
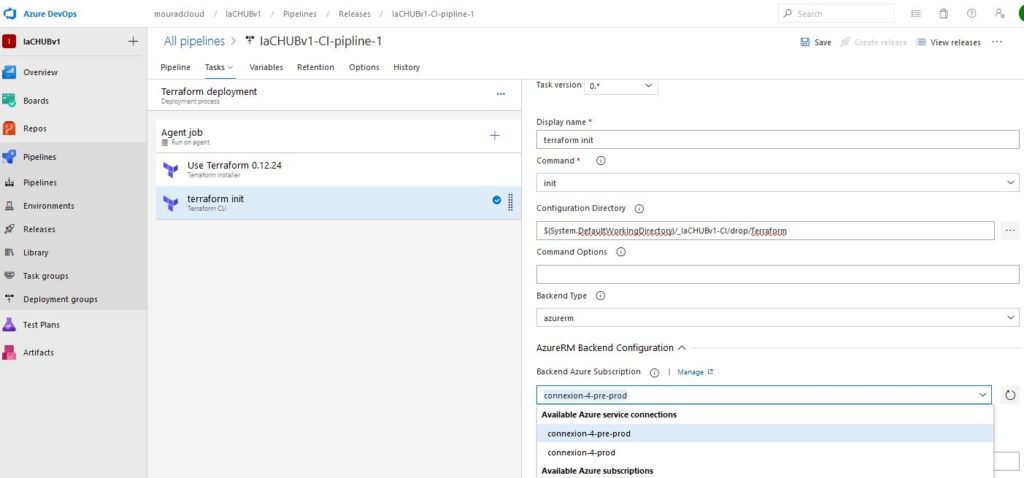
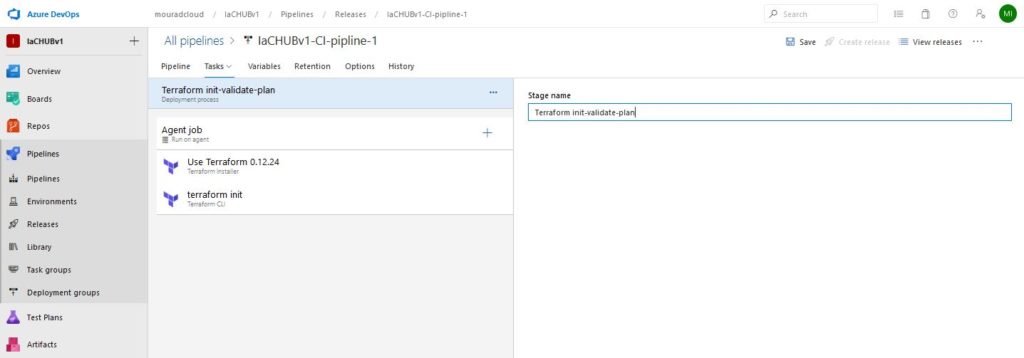
Then we add terraform command for init . The terraform init command is used to initialize a working directory containing Terraform configuration files. This is the first command that should be run.
We select the Terraform CLI task and click on the Add button next to it, in this step, we will configure Terraform CLI for Terraform Init.
Configure the init Command, the Configuration Directory to use the drop/Terraform folder of the Build Pipeline and select azurerm in the Backend Type dropdown.
We have not configure the AzureRM yet, so this is the perfect moment.
Expand the AzureRM Backend Configuration and select an existing Azure Subscription. If we don’t have an Azure Subscription configured, we click on + New button to configure one.
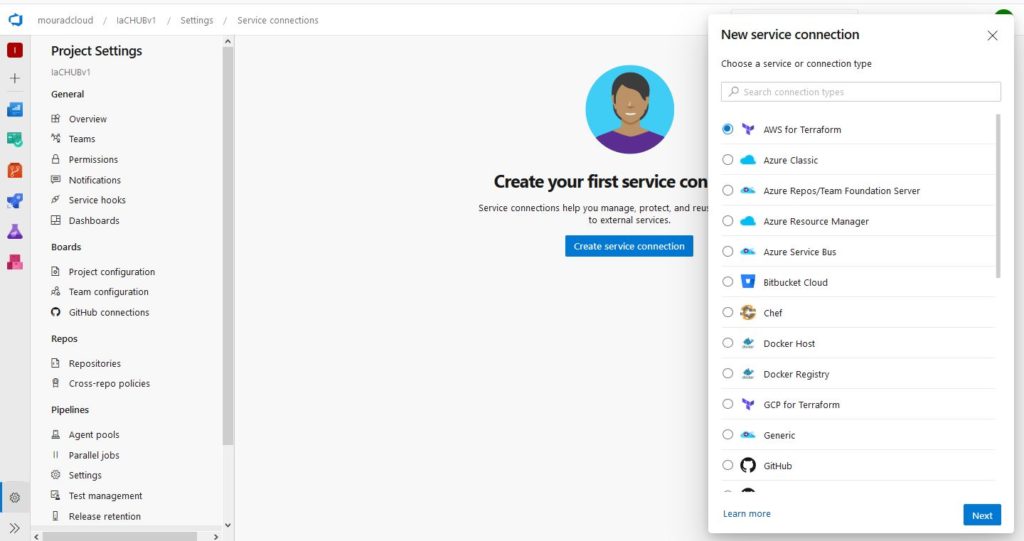
It is taking you to the connections pages :
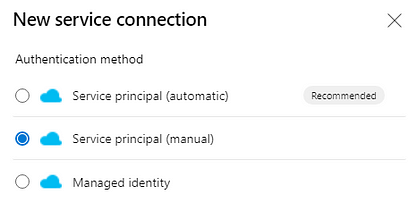
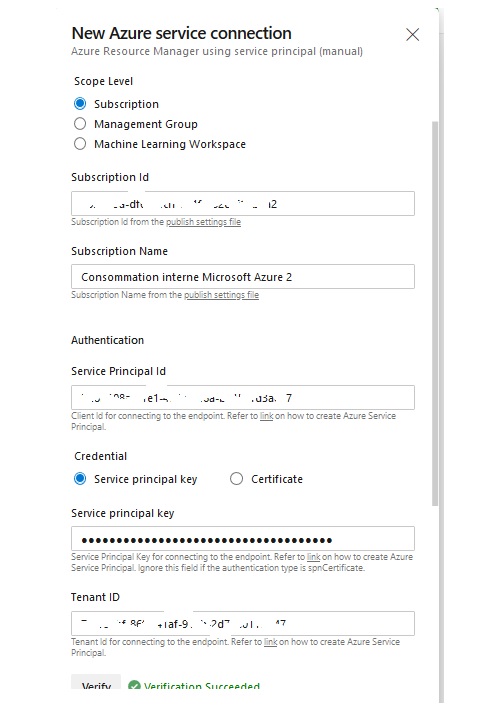
Then, we select the Service principal (manual) option.
Then you will enter the above information that you received when you created the service principals :
After registering all connections, you will see them available there :
Then, we configure the Azure Remote Backend and we have a few options:
Use the Create Backend (If not exists) option
Use an existing Remote Backend created with scripts if one existes
Automate the process adding an extra task on the pipeline.
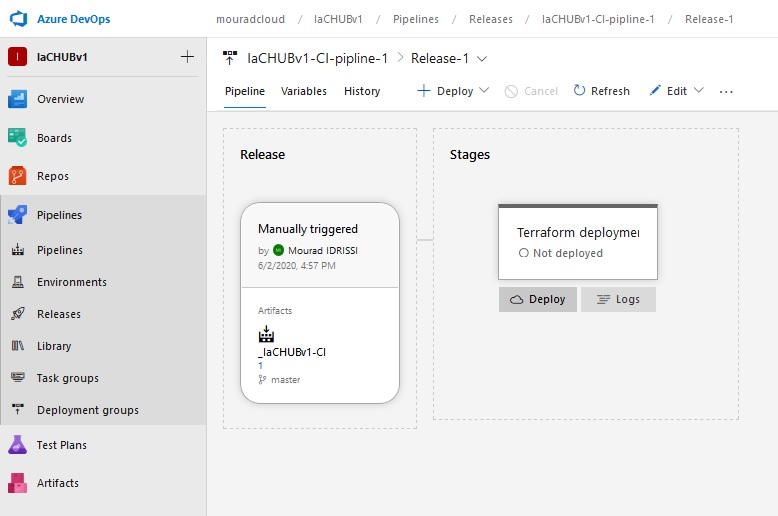
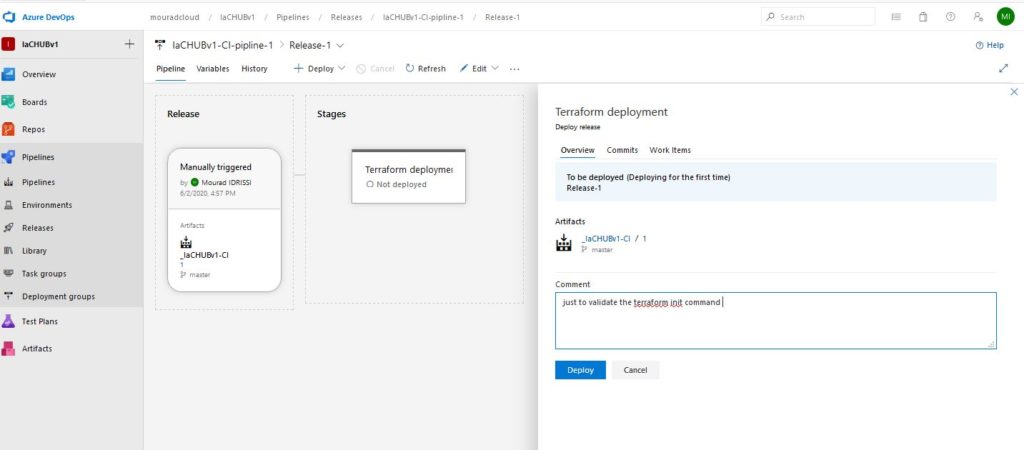
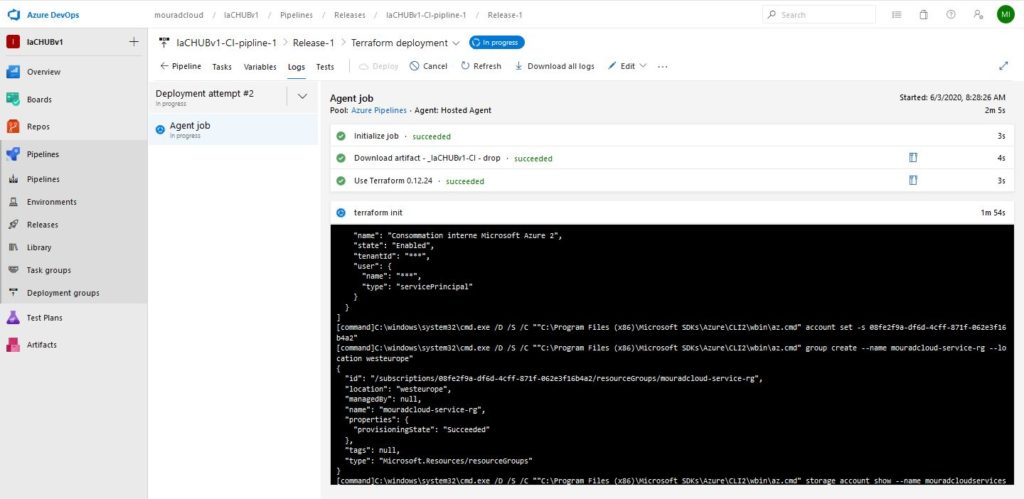
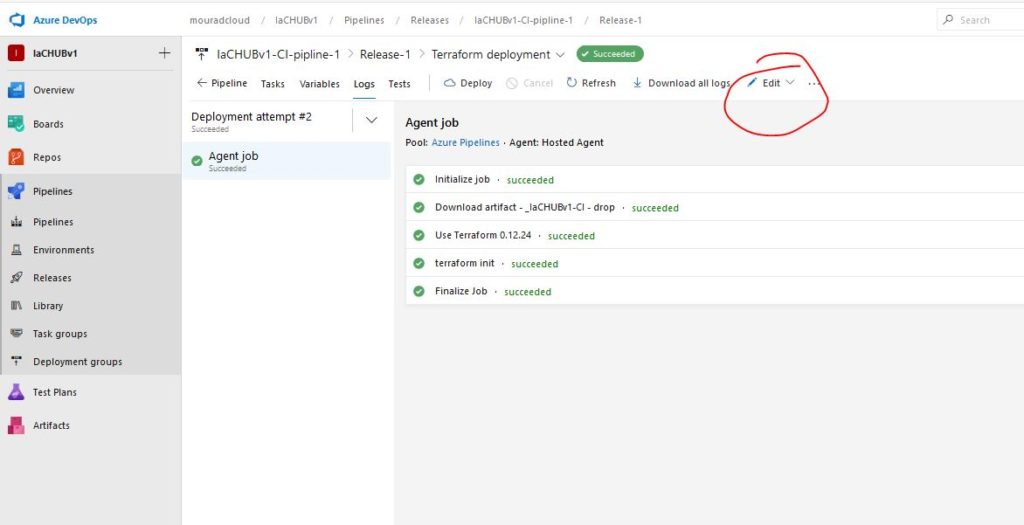
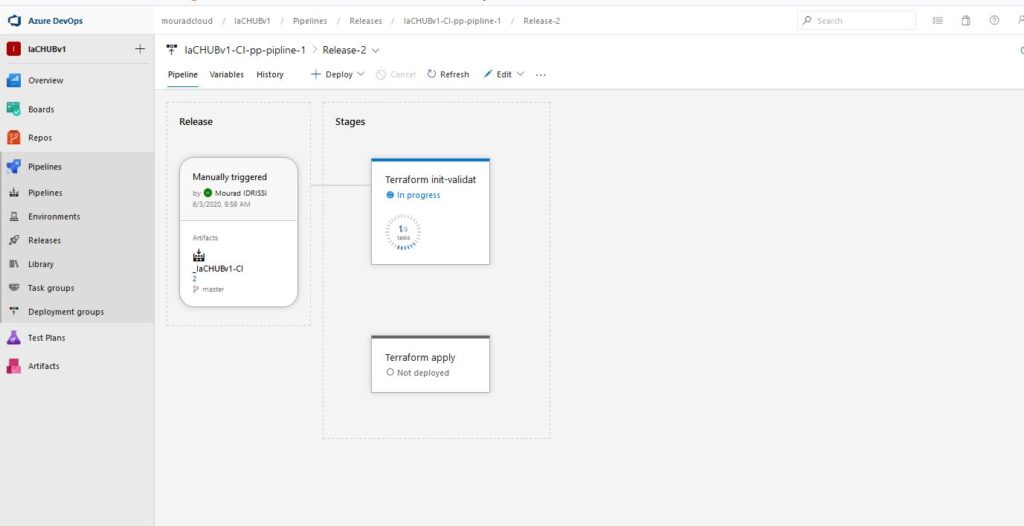
In order to validate, we will just start the release to make sure every thing is working fine, we will do the terraform apply afterwards
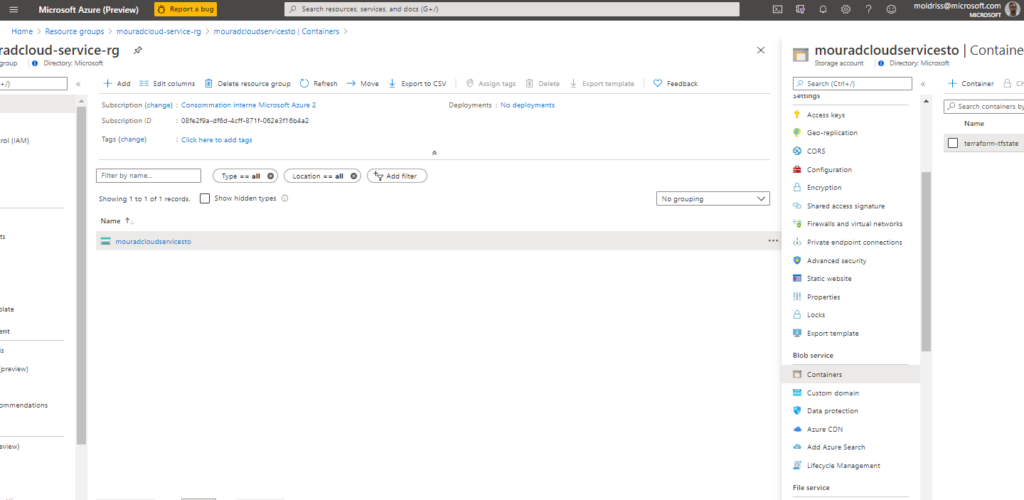
So it created a Storage account in a ressource group for service usage and this will be used to store the state of terraform files config ( not that it is windows logs… I forgot to validate to linux ubuntu for agent… I will correct this ) .
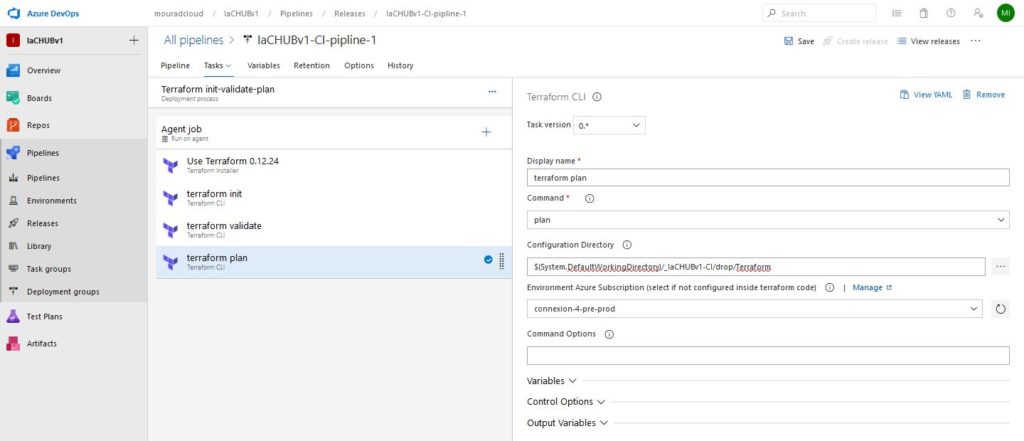
Let’s go now to the terraform validate, plan and apply
However, I will do it in a 2 steps :
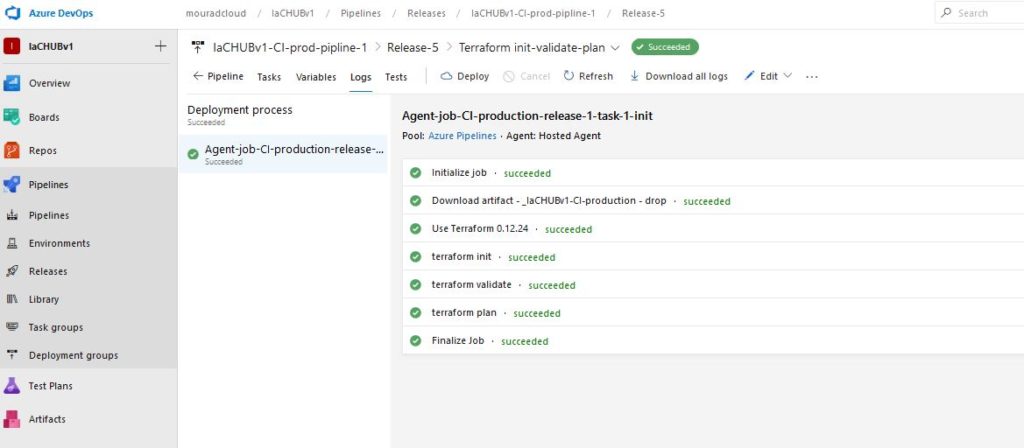
Step 1 : Terraform Init validate and plan
Step 2 : adding terraform apply in a second task and I want to be sure to have no error before applying changes ( this is useful if i want to bring management validations )
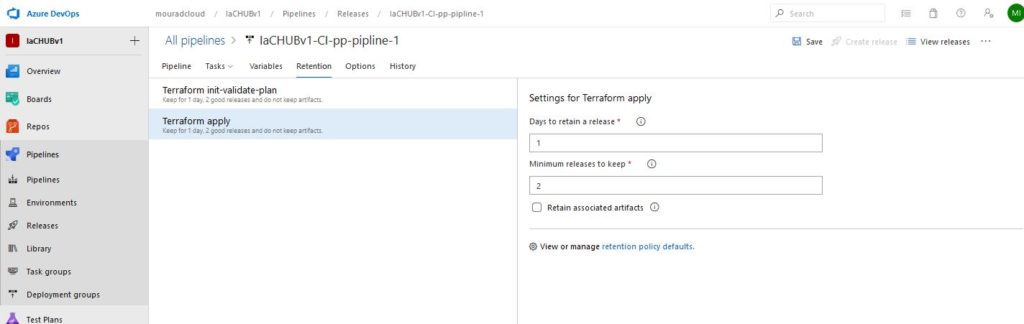
Also, (optional but recommanded) you can adjust the retention, otherwise you will find yourself with a lot of artifacts , releases etc and you might get lost rapidly..
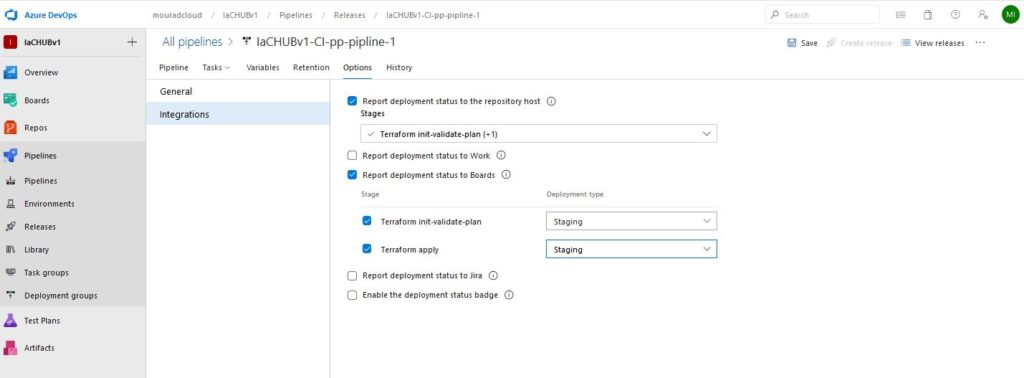
Optional Too : you can report to Azure Devops boards the release pipeline tasks :
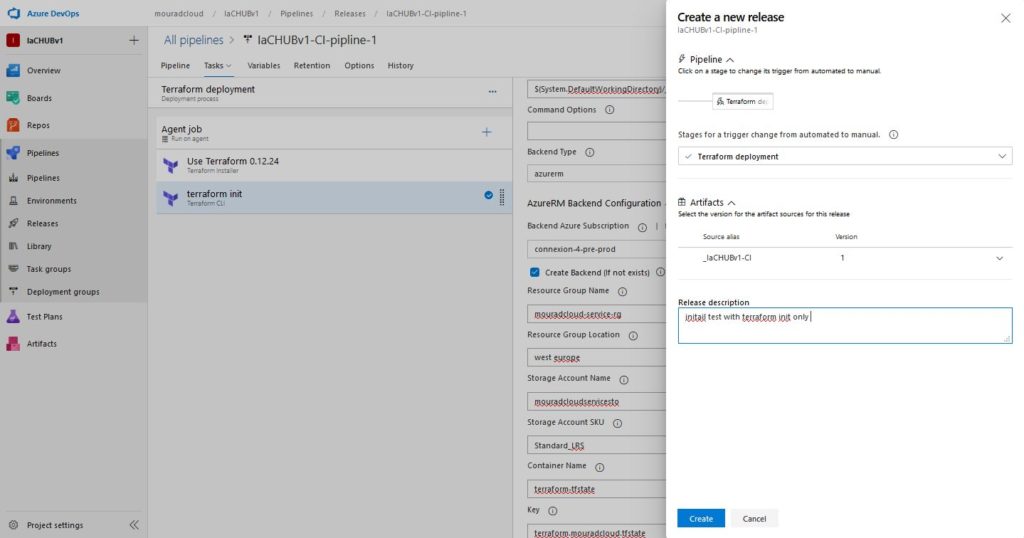
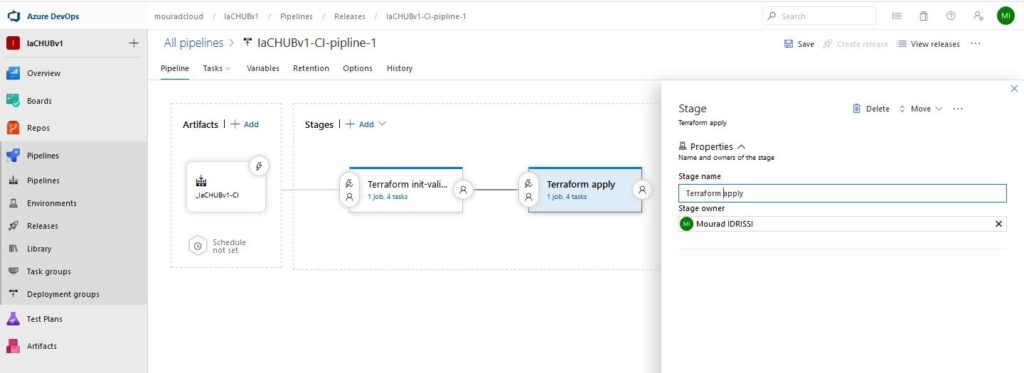
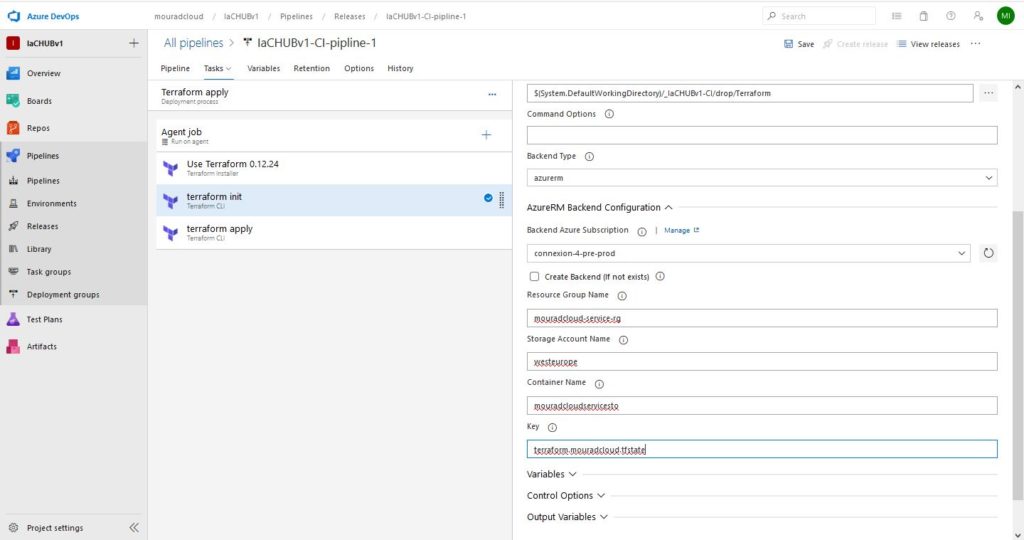
Unfortunately, for the second task we need to bring a second “init” step because we need to make the terraform job to have the details for state :
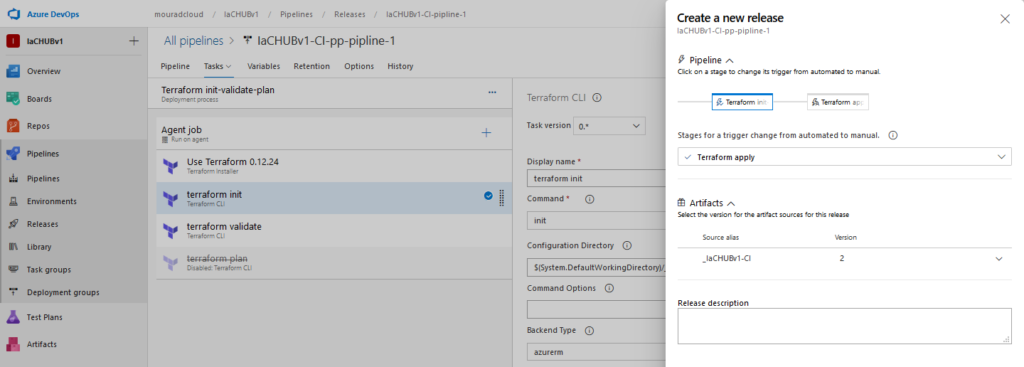
Do not foreget to set the second task to manual otherwise the deployment will be automatic :
then create the release :
Seems OK ……
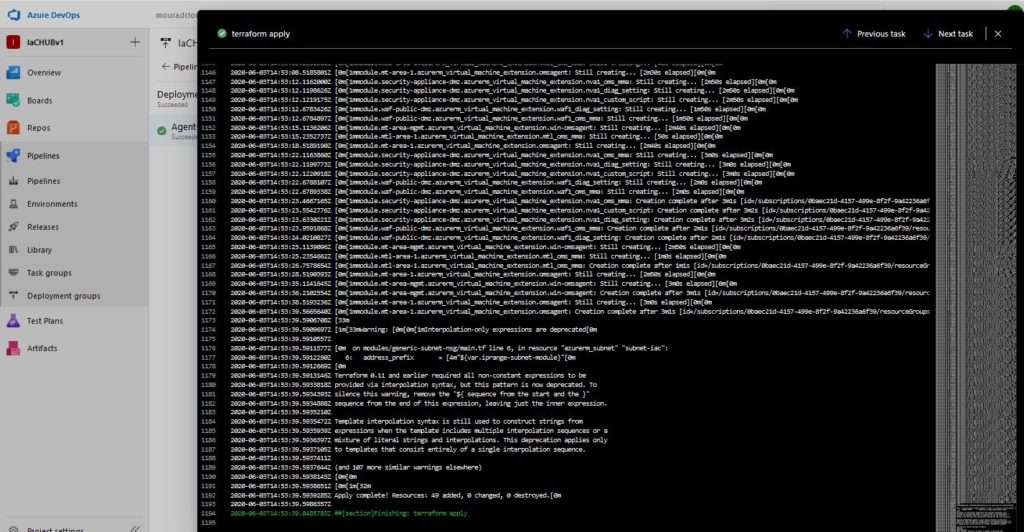
Till the end of the deployment :
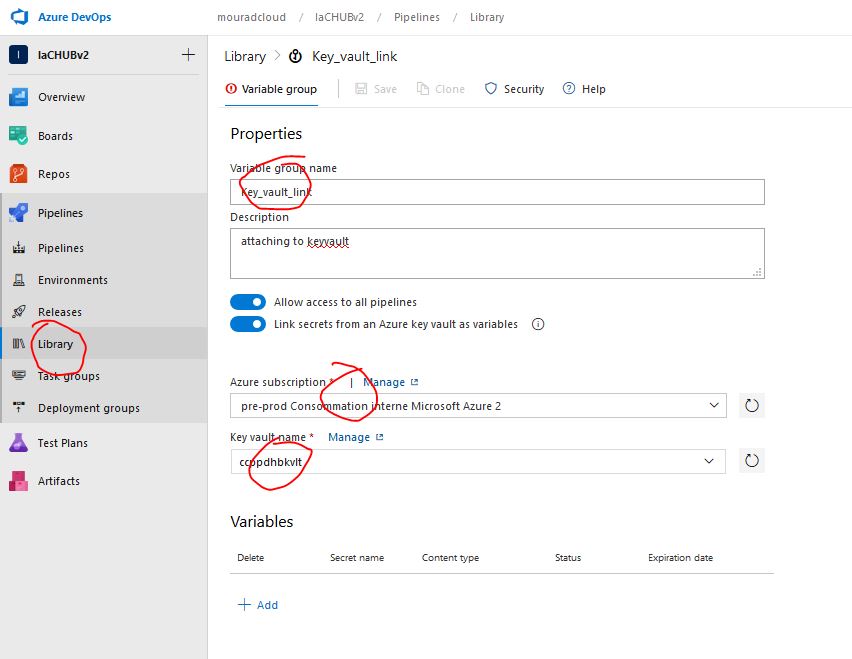
Just to finish this, we can use keyvault to store secrets and call the secrets using environment variables. If secrets are present, you just need to refresh and you will see it.
Remember we created an azure key vault thru Terraform and updated a secret thru it.
For the sake of the demonstration, I will add a new secret thru Az shell portal.
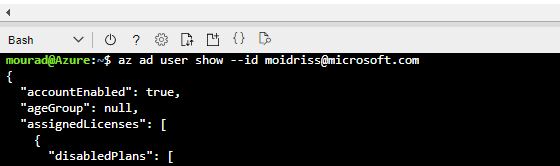
first we need to get user shell data :
az ad user show --id <email-address-of-user>
You will be looking for the “objectId” value, or just :
az ad user show --id <email-address-of-user> --query "objectId
Then allow your user to manipulate :
az keyvault set-policy -n <your-unique-keyvault-name> --spn <ApplicationID-of-your-service-principal> --secret-permissions get list set delete --key-permissions create decrypt delete encrypt get list unwrapKey wrapKey
Then finally create a secret entry :
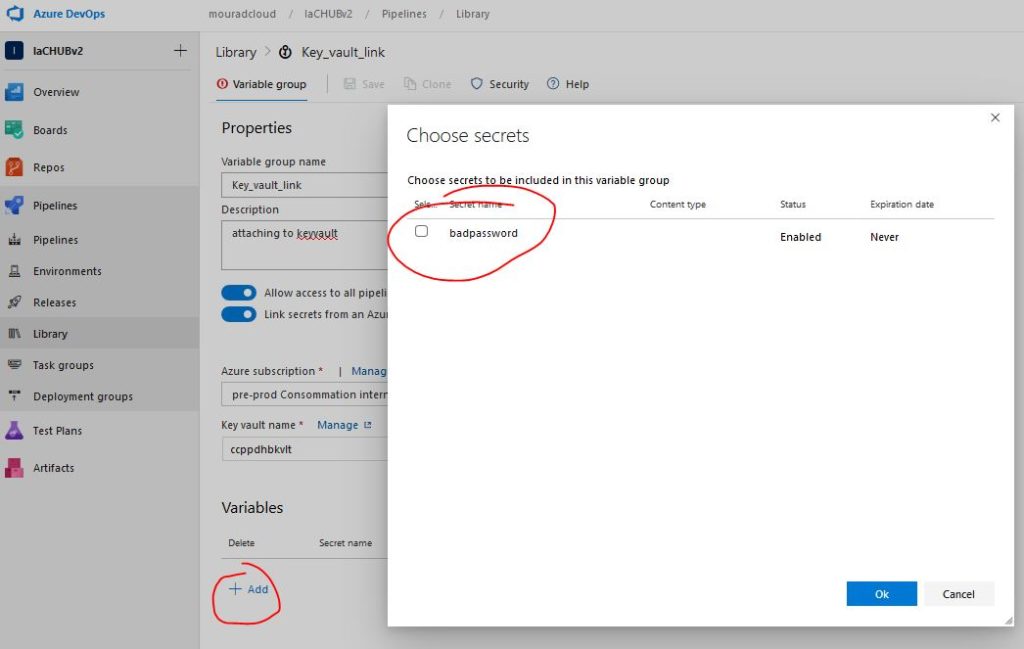
az keyvault secret set --vault-name "ccppdhbkvlt" --name "badpassword" --value "hVFkk965BuUv"
Then you select the secret you want to import :
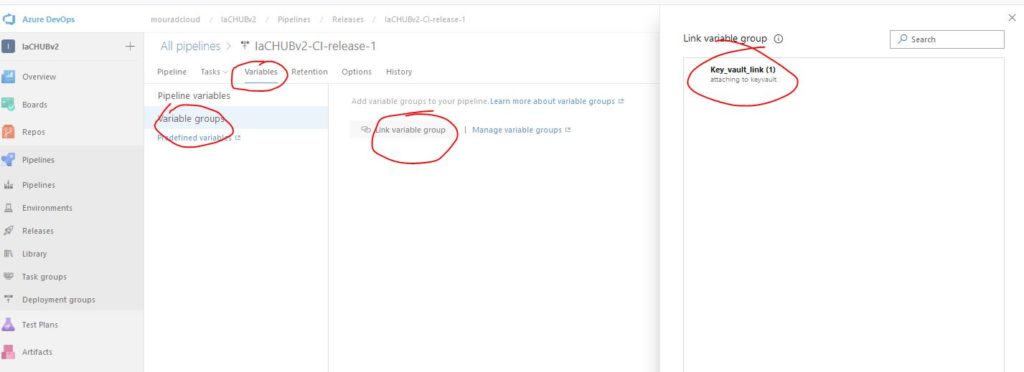
Then save and go to your release pipeline the variable section and link rhe variable group that is in keyvault :
Now you just need to use the variable ‘badpassword’ in the variable.tf and variable.tfvars files and you are good to go. This can be typically used to store password for VMs for instance..
In this thread, I am going to test FreeNas on Azure.
First part is install. You need to create a VM on HyperVM first :
Make sure this you create a Gen 1 VM like this is mentioned in this Tuto. You can follow up at this link if this is the first time you create a VM on Hyper-V and send it to Azure.
Lastly, just check that you have access to it locally, I personnaly used a 2 NIC configuration and only one Disk OS of 80 GBs. I will add the disks later on the Azure portal.
sudo ipsec start
sudo ipsec restart
sudo ipsec auto --add azure-oci
sudo ipsec auto --up azure-oci
sudo ipsec status
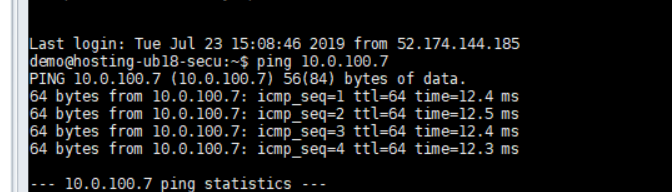
And finally the ping ( make sure the ICMP is allowed from both side with NSGs and security lists) …:
From OCI to Azure :
From Azure to OCI :
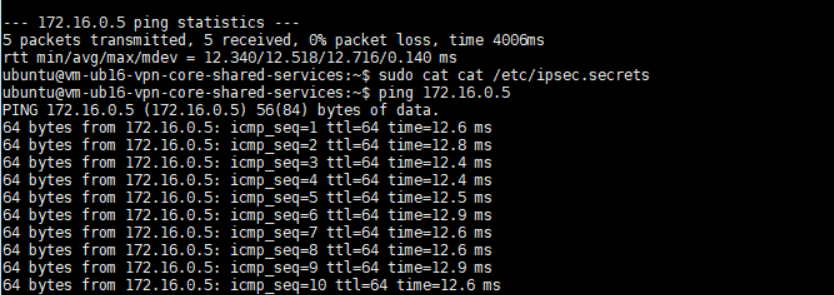
Before Going further let’s see if my OCI VMs can go thru my VPN Azure instance to reach other instance ( that would be my next hop and DMZ ) , in order to do that, I first should add a static route :
The test a ping to a the next VM (172.16.0.7) in the same subnet as my 172.16.0.5 VM that is on my VPN subnet
As you can see above, if I do a Ping to an instance that is just after, it goes thru the VPN intance to reach the other ( it is not reply to ping Because my next hop is a PFsens Firewall on which I removed ping )
After successfully setting up a tenancy strategy ( one vs many tenants, using either policies or compartments ) we can start build IaaS things.
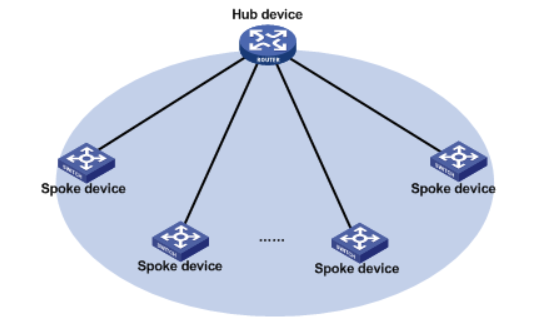
First, in a hub and spoke approach, it is interesting to build a network with at its core a small network that will be the center of all the managed environment on your cloud.
Let’s assume the core network will be in the main tenant and in the core-shared-services compartment. And other compartments will either overlap or will be separate , again, this is a choice of governance. Let’s assume we are going to do it that way :
So now, we go straight to the portal to create our first VCN :
then 2 first subnets 1 for public (10.0.100.0/28) the other one for private traffic (10.0.100.16/28) :
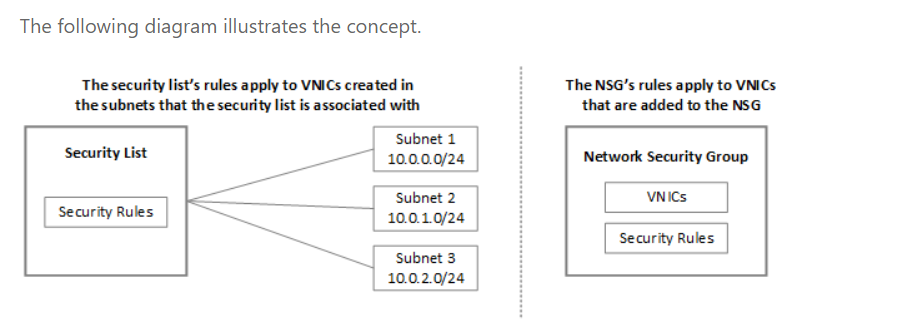
Now in order to set a first level of basic traffic we will add a security list to limit the traditional flow for VPN. be-aware that from an MS Azure perspective , NSG is a little different.
Do not forget ICMP ( for initial troubleshooting :
Do not forget egress rule ( niece to have for ping troubleshooting )
To be applied to the correct subnet ( the front one used for VPN ). I also added ssh for troubleshooting…
Now I will add my newly created security list to my front public subnet for VPN :
Applied :
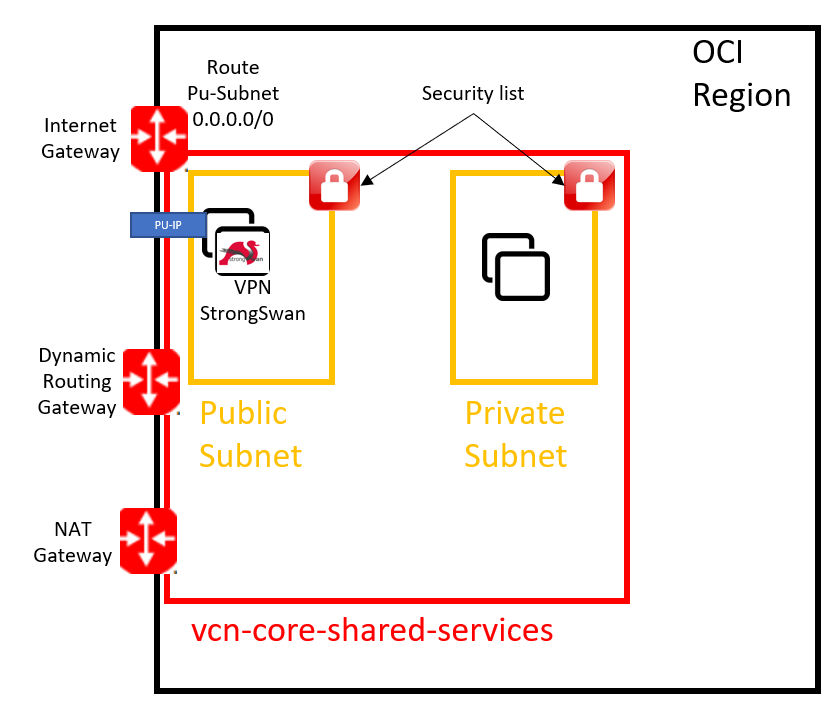
We will add an internet gateway to get internet access for public facing subnet
Adding a route table for 0.0.0.0/0 and target to Internet Gateway :
Also ( and very important… ), if you did not create a route table initially, the default route will be used, if so, you will have to add the rules to this route that is created by default :
Adding a NAT Gateway for VMs to reach internet :
Now add routing to the default route :
Also adding a Dynamic Routing Gateway ( used later for IPsec Connexions ) :
Attach it to VCN :
So far, here is the conceptualization of what we build :
First Thing to do after receiving the activation mail from Oracle is to create you tenancy.
Here is a picture of what my tenancy “mouracloud” looks like
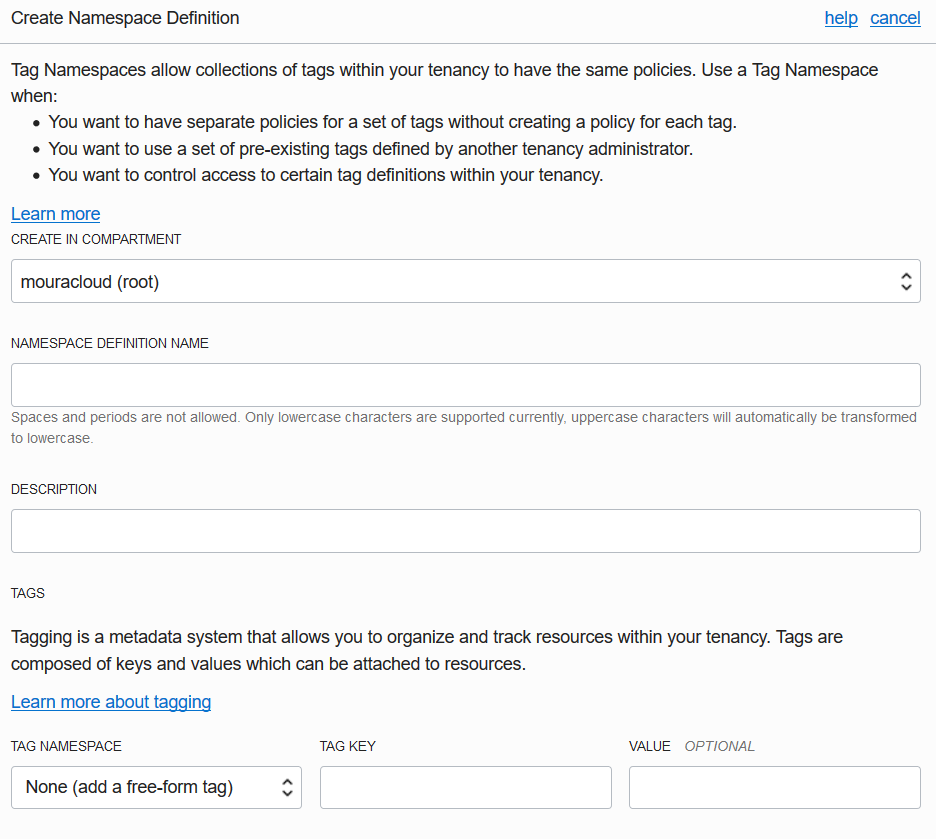
Before adding new users, I am going to have a look at the tags options on OCI.
To do So, you should go on the Governance tab on the admin panel :
I want to have kind of a “corp” set of behavior and limitation ( this will certainly be good to have it later… SO, I am preparing the field vine yard here.. 🙂 ).
Then Start tags/key definition :
after that you might want to not work in the root compartment, so you are going to create a new one that is going to be high in the hierarchy but not at the root. This will be certainly used as a collection of assets managed centrally by IT then to serve needs from other depts in the company.
So far I feel a little bit alone, don’t you ? 🙂 So it is time to add new people in the process and give rights. So far, there is the root user and another user ( that is also myself but not root ) .
So let’s start by creating a group of users that will actually be the IT ops guys :
Then create a first user and lastly adding him to the group :
The group :
In case I am no more able to manage my cloud, I will add a second user as administrator in the administrator group…
Now let’s build create a policy to allow my admin-it Guy manage the assets in the compartment used for core-shared-services.
The policies is a set of rules and guidelines that will define :
The group(s) or user(s)
with given right(s) and action(s)
to a target(s)
in a given location(s)
with some condition(s)
This will resemble something like this ( below ) which very powerful yet complex to start, but this is actually the core of the value. While other like Azure provide a hierarchy, here we have a native matricial approach to manage the rights and scopes
Allow <subject> to <verb> <resource-type> in <location> where <conditions>
We can notice that enterprise groups and procedures will easily align and be enforced here thru this approach while the “open bar” feeling is by default not there ( unless lazy admins…. :). So now let’s translate that to our needs :
Allow group admin-it to manage all-resources in compartment core-shared-services
Ok, so Now I will be able to forget the administrators ( for now ) account and let the admin-it account do the operations and play IaaS.
Hi in this article we are going to discuss how to create an app that will respond to a given request. It is available here
This is basically a webapp written using python Flask Framework. I will test integration of several cloud features in a given webapp (Upload pictures / resize it and visualize it, login functionality, Web scrapping etc..)
CSS will be ugly ( meaning I copy-pasted a lot ! ). Lastly every time I add a major feature I will upload it in a container registry and call it from the cloud platform command line.
The Version 1 of the WebApp will have the following characteristics
HOSTING :
Single VM in Azure
FEATURES
Pages : Presentation of me / Contact / Login with local user defined locally on app for the moment
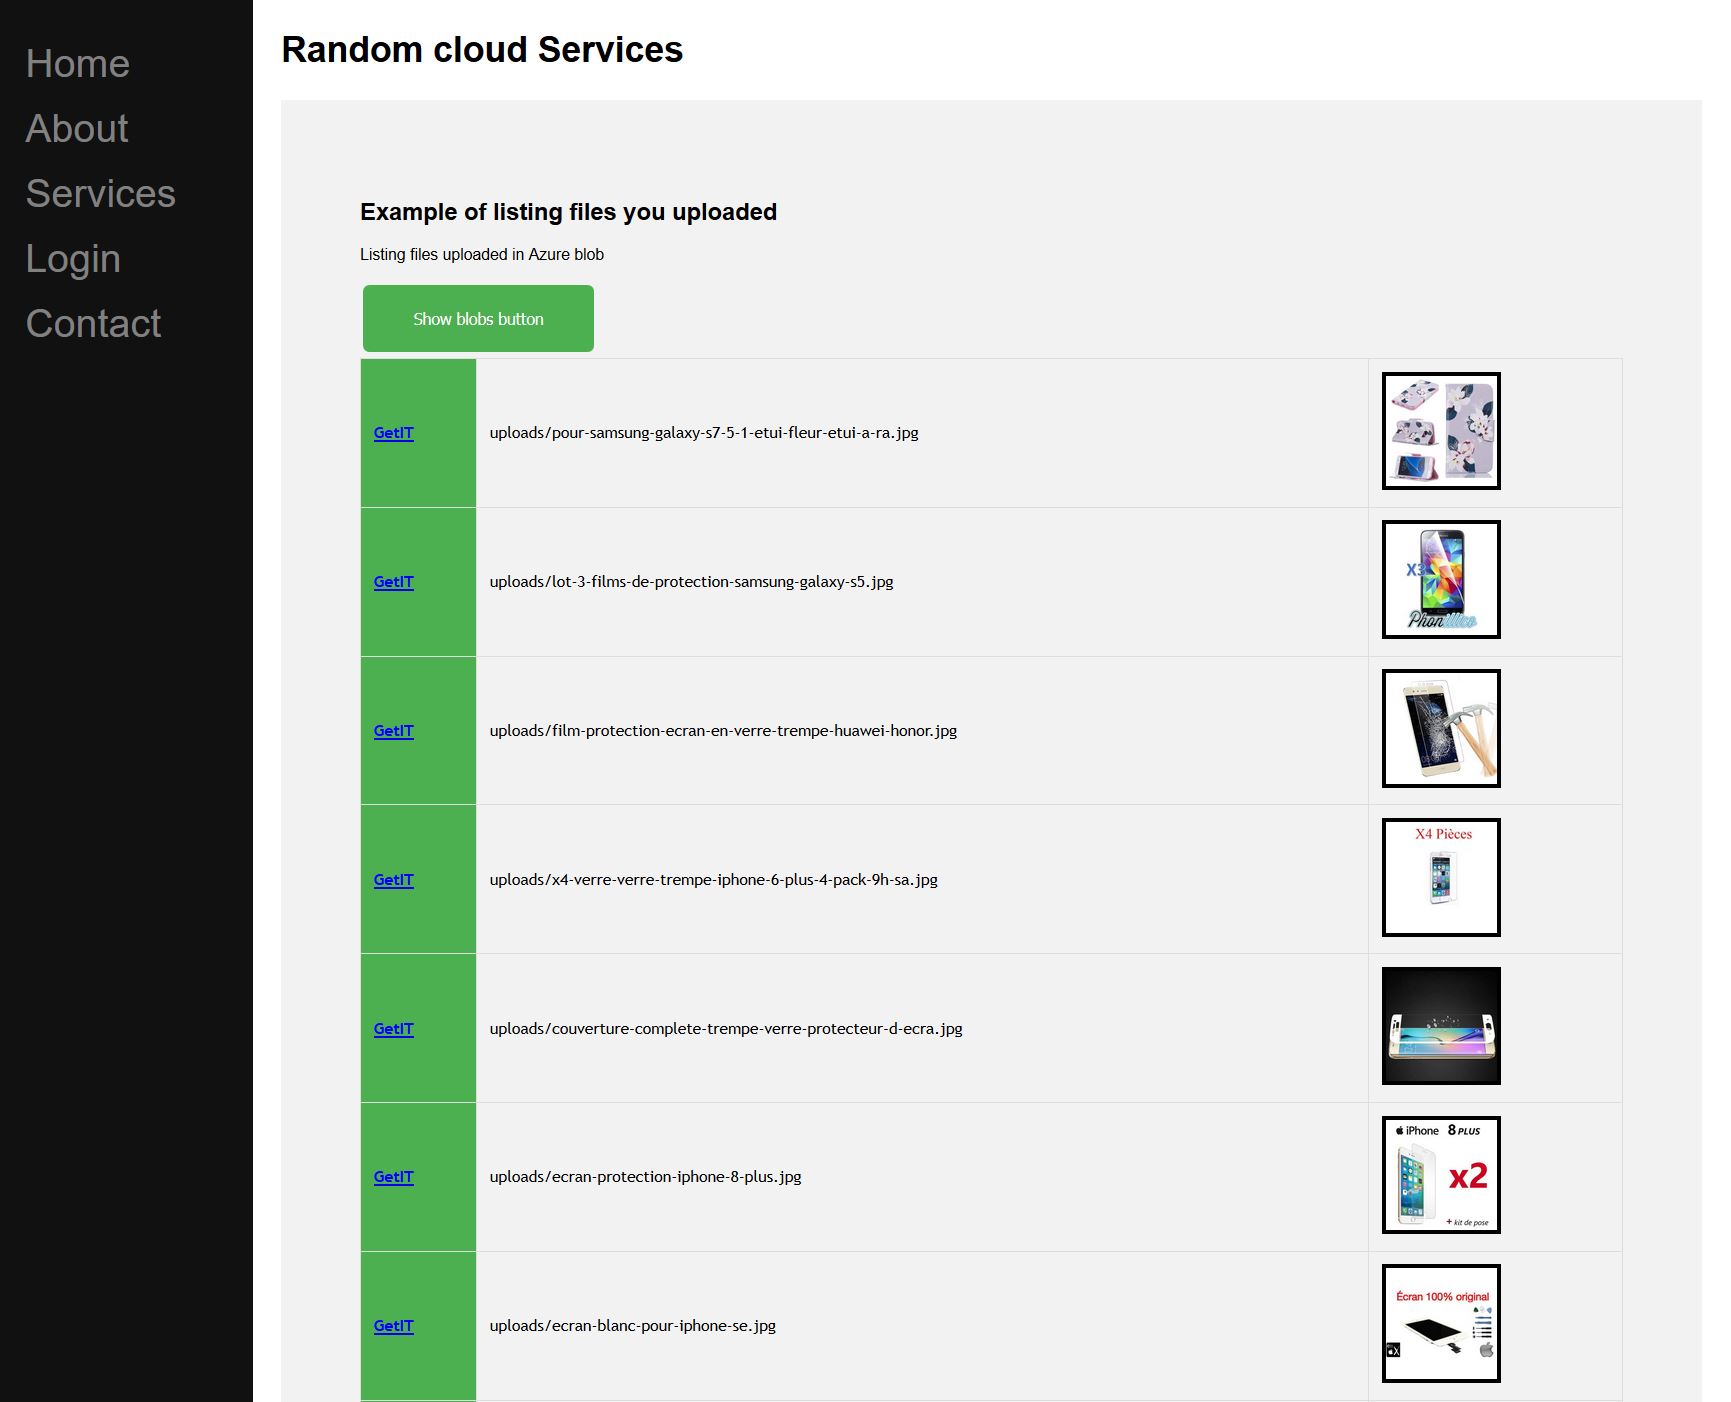
Services page :
Upload / list uploaded pictures
IP localization ( from file today, will be a separate service itself in the future)